Sunday, September 15, 2019

Dr. Col Lector - Doctor of Optometry


Hello!! I'd like to introduce Dr. Col Lector aka Collector. This is the 2nd of 3 projects made for Tim Holtz's amazing Halloween Idea-Ology release. The eyeballs were the inspiration for this project. As I sat with them I thought of a traveling salesman's kit. Then as I was reading all of the type tokens my backstory took a spooky turn when I came across the "Found Objects" token.
Dr. Col Lector is an optometrist but just how reputable is he? His case of found objects leaves many questioning where he finds his inventory. 


The base of this piece is a Vignette Box covered with paper from the Abandoned Paper Stash. The top of the box features the Cigar Box from the Layers and Baseboards Frames. The Poison label came from the same package. The Poison label was messy stitched onto the piece of Abandoned paper before adhering to the box. 


Any good salesman's case needs a handle for easy traveling. I adhered a Mini Hardware Pull to the side of the Trinket Tin using Distress Collage Medium and layered the Pull with Hardware Heads. Before adhering the Pull I wrapped it with Craft Thread distressed with Walnut Stain Distress Crayon. Once the handle was dry I added the Found Objects Quote Token on a Loop Pin. 


To finish off the open corner of the box I added an Apothecary Vial, Alpha Dice, and vintage lens. 


This artificial eye chart also from the Layers and Baseboards Frame set was perfect for our devious doctor. The eye chart is layered behind a Baseboard Frame that has been sanded and distressed. I added Hardware Heads to the corners. The bottom of the frame is adorned with a Toxique label and that creepy White the Druggist eye was perfect for the top. 

This particular Paper Doll had just the right amount of creep. He holds his favorite tool a spoon from the Silverware Adornments. 


The doctor's fine inventory on display. As you can see he has had some business and will need to restock soon. 


The calling card is fashioned from a piece of wide vintage velvet ribbon. The doctor's info was created using a label and words from the Curiosities Sticker Book. I have to say the Sticker Book was one of my favorite things from this release. 

I added a border of messy stitching not shown here before adhering the calling card inside the case. 


Here is a peek at how I made the dividers for the case. I began by cutting chipboard to length to fit the tin. I cut two longer pieces to run horizontally and three smaller pieces to run vertically. After measuring where they would intersect I cut small notches in the chipboard. I then covered all the pieces with the same vintage ribbon used to make the calling card. After the glue had dried I went back and snipped the ribbon where the slits had been cut in the chipboard. I then assembled the dividers and inserted into the case. 


I love how just a little bit of Alcohol Ink can up the spooky factor of these eyes. I used a very fine paintbrush and Watermelon and Latte Alcohol Ink to add veins to the eyes. 


The backside of the piece follows thru with an eye chart and Apothecary Vial. The lid to the Trinket Tin was distressed with Mushroom Alcohol Ink and then layered with a label from the Halloween Ephemera pack and a Quote Chip. 


I hope you enjoyed this walk-thru of the project and peek into the background story I had in mind while creating this piece. 

All I know is I sure wouldn't want to find myself in a dark alley with Dr. Col Lector.

Happy Creating ~ Jennalee 

Thursday, August 8, 2019

The Haunted Mirror

Hello!! I'm so happy to share my Haunted Mirror project with you today. Did you see the amazing Halloween Ideaology release from Tim Holtz? You can catch the replay here. There are so many amazing designer projects featuring this inspiring new release. I am so grateful that I was included in the fun and hard work that comes with a new release. 

I'll be the first to admit that I am a big wimp and very easily scared. Absolutely NO scary movies for this girl. So this project was a bit spooky for me!! More than once I caught a glimpse of the mirror out of the corner of my eye and jumped. 


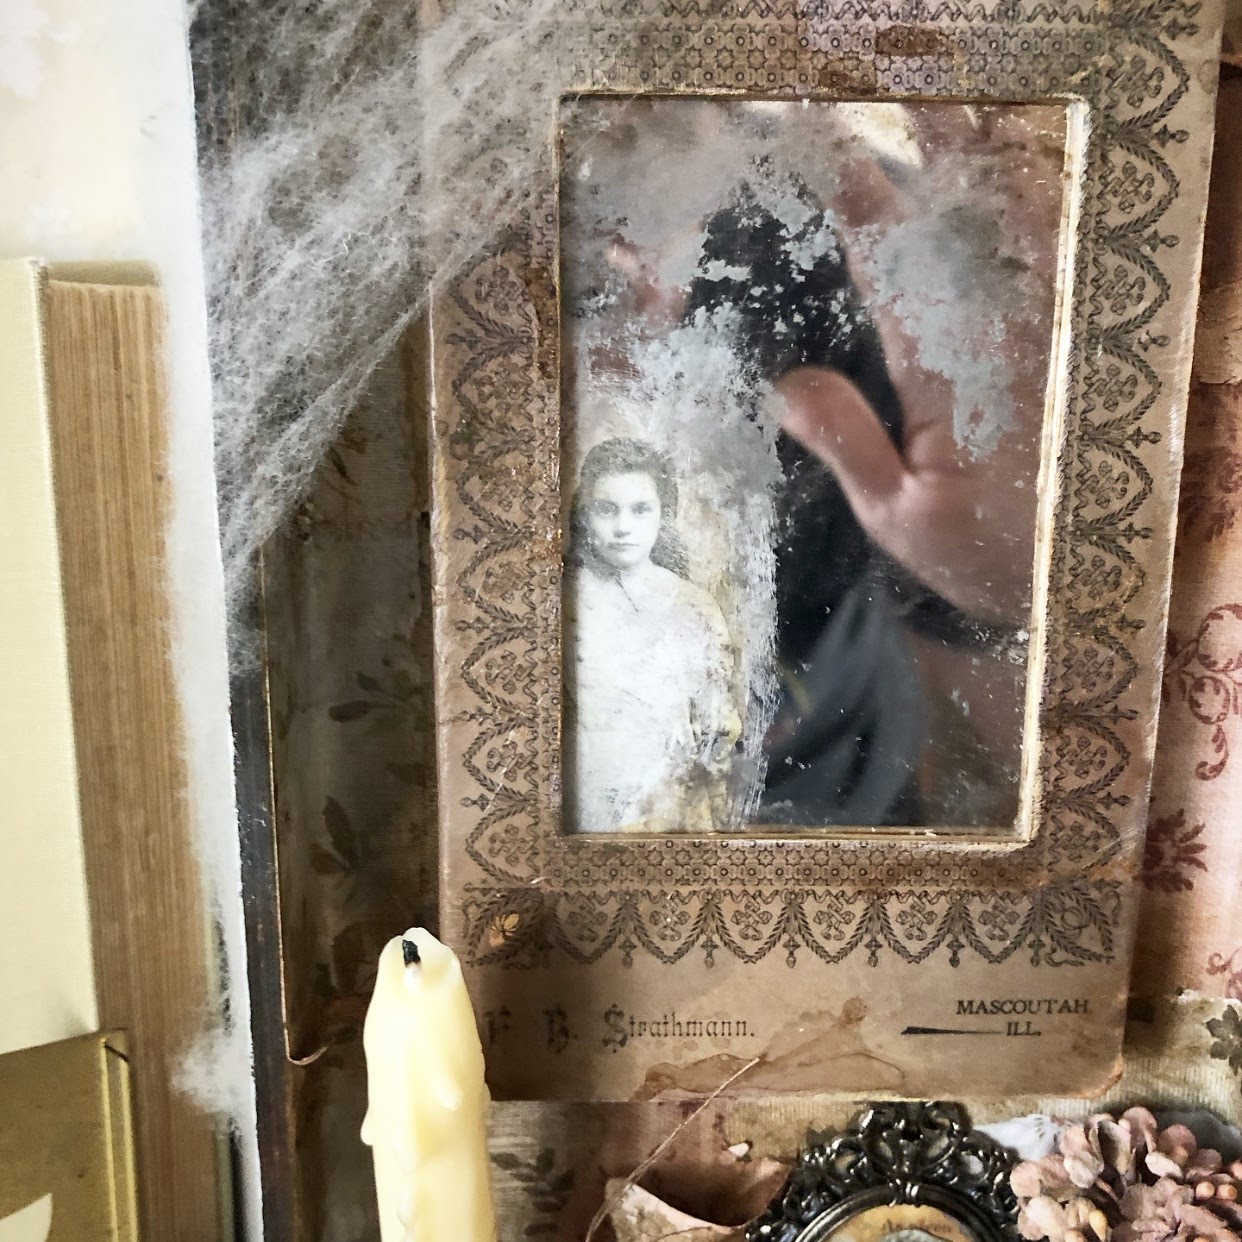
As I was looking at all the new products the combination of the Wallpaper and this Baseboard Frame made me think of a Victorian mirror. Then I came across this very spooky girl from the Paper Doll pack and knew she needed to haunt the mirror. 


I began by turning a Vignette Tray into a creepy abandoned room. I spent some time looking at abandoned rooms on Pinterest they are beautifully haunting and sparked so many questions.

I started by laying down a few larger pieces of the wallpaper and adhered them with Collage Medium. I then filled in any blank spaces with smaller pieces ripped to size. I let the Collage Medium dry and then started ripping back corners here and there. Because the corners had been glued down and then rolled back they gave a more authentic effect of peeling wallpaper. 


Then the fun part distressing!! I pulled out my Vintage Photo and Walnut Stain Distress Crayons. The Wallpaper has a wonderful texture that is perfect for using the Distress Crayons on. I just scribbled the crayon right onto the paper and then smudged it around using a baby wipe. I also used Vintage Photo Distress Ink with a blending tool. 


I used a piece of Mirrored for the mirror. I originally thought of doing an image transfer on the front of the mirror but then thought it would be creepier if it appeared that the ghostly girl was in the mirror. So I started experimenting. 

I found the best way to achieve this was to figure out the area you wanted your ghost to appear and remove the white backing from that area only. To remove the adhesive I applied a layer of alcohol hand sanitizer and let it sit for a few minutes. I then went in with a gift card and some elbow grease and scraped away the adhesive layer. You may need to do this step a 2nd time. 

There will still be a slight bit of tackiness left this is where the Acetone polish remover comes in handy. It helps to remove any remaining adhesive and also removes the silver backing of the mirror. 


You don't want to remove all of the silver otherwise the ghost won't blend in. 


Here you can see the bottom left corner is where I have removed the silver backing. To distress the front I lightly pounced some spots with the polish remover and then applied Mushroom Alcohol Ink. To the back of the mirror I add a bit Tarnished Brass Distress Paint as a halo around the area where the silver was removed. 


I adhered the ghostly Paper Doll to a piece of Metallic Kraft. I then added a bit of color around her with Mushroom Alcohol Ink. 


I then used the remaining adhesive back on the mirror to adhere the Metallic Kraft to the mirror. 


I sanded the frame and added Distress Crazing Medium randomly around the frame. Once the Crazing Medium air-dried I went in with Vintage Photo Distress Crayon and Distress Ink to further distress. 


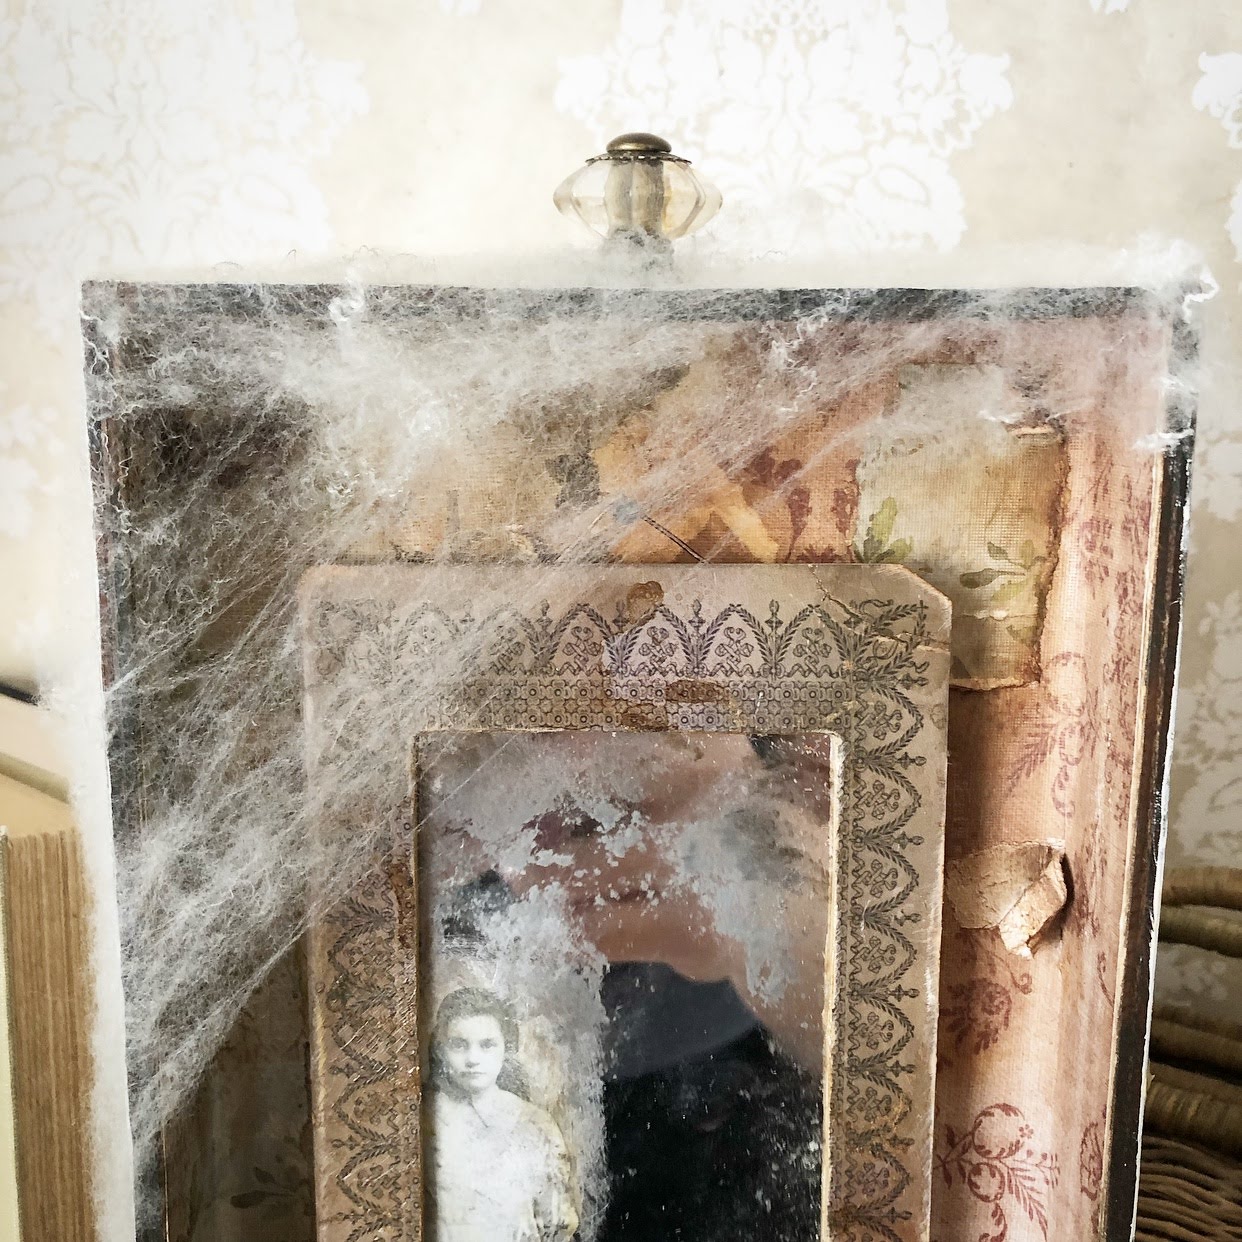
Here is the mirror all finished up. Can you see me waving? 


I added a small wire hanger at the top of the mirror and added a nail from the Vignette Hardware Pack in the Vignette Tray. I like how this allows the mirror to swing and adds to the ghostly effect. 


For the candlestick I painted and distressed a Finial Base. 


Then came the fun part!! Fire!! I used a cheap taper candle from the dollar store so it melted very easily with my heat gun. I started by cutting it down to size and then using my heat gun added the drips to the candle and finial base. To adhere the candle to the base I blasted it with my heat gun and then set it on the base and let it cool in place. To give it a more authentic look I lit the candle for just a minute. 


For the book cover I used a piece from the Snippets pack. 


I colored a piece of canvas using Fired Brick Distress Oxide Spray. 


For the book pages I cut regular copy paper to size and coffee dyed. Once the pages were dry I split them into 3 signatures and stitched each signature onto the canvas piece. 


I then had some fun writing a story using the Halloween Clipping Stickers. 


The new Mummy Cloth is such a yummy texture and takes ink so easily.


I added a piece of Etcetera Trim to the bottom edge of the Vignette Box to create a larger area for my mantle decor.  


To decorate the mantle I added the Mummy Cloth as a runner and then adhered the candlestick, a couple of Pumpkins that were distressed to look dusty, a vintage glass bottle adorned with a Rub-On and an arrangement of Bouquet Flowers. Hanging behind the bottle is a family portrait created with a Baroque Frame layered over a scrap of Abandoned patterned paper. I left the little book loose so that the story could be read. 


To finish off the piece I added a Curio Knob to the top of the Vignette Tray and draped it with some faux spider web. 


I really had fun with this project. The idea of abandoned rooms really had me wondering what happened? So many questions left unanswered. 

Be sure to stop by Tim's blog and catch the replay and see all of the other designer's amazing work. A huge thank you to Tim, Mario, and Paula for all they do and for including me in the fun. 

Leave me a note and let me know you stopped by today.
Happy Creating ~ Jennalee 


Monday, July 29, 2019

Fly Away

Hello!! I'm excited to announce that I have joined the Topflight Stamps design team. I am sharing my first project for them today inspired by the Studio Light "Fly Away" set paired with some of my favorite Tim Holtz products I created this quick and easy altered spool. Let's get started.


I began by painting some Bouquet Flowers with some watered down Paper Artsy Fresco Finish in Mulled Wine. Not pictured I colored in the stamens of the flowers using Mustard Seed Distress Marker. 


I then painted a spool with a thin coat of Paper Artsy Fresco Finish in Taupe. Once dry I lightly sanded to distress and then blended in Vintage Photo Distress Ink. 


For the wings I used a brayer and light layers of Paper Artsy Fresco Finish in Stone on book text. 


Once dry I stamped the wings from the "Fly Away" set using Ground Espresso and Hickory Smoke Archival Ink. I then fussy cut each of the wings. I layered the wings and fluffed them out a bit and then adhered to the back of a Tim Holtz Paper Doll. 


I added one of Tim's Milk Caps to the top of the spool to provide a little more surface area and because they're so dang cute. On the bottom of the spool, I wrapped a ticket from the Keepsakes ephemera pack and a vintage postage stamp. To finish it off I tied a distressed piece of Craft Thread around the spool.


Using a portion of the "Fly Away" stamp I stamped the Wings text on a Classic Label Sticker and adhered to a Corked Vial filled with Clear Rock Candy Dry Glitter. The Paper Doll was sanded and lightly colored with Distress Markers and Vintage Photo Distress Ink. 


I adhered the Paper Doll to the top of the spool and then placed the Corked Vial next to her. Once dry I started layering moss and the painted Bouquet Flowers. 


It was fun working small. And finishing a project in an afternoon. If you don't know I'm the slowest maker ever and a classic overthinker!! 

Thanks for stopping by today. Leave me a note and say hi.
Happy Creating ~ Jennalee 


Friday, June 21, 2019

Steampunk Seamstress

Hello and happy Friday!! It's Jennalee here today. Today I am sharing my last project as a team member with Gypsy Soul Laser Cuts. I've been with the team for 2 years and am so thankful to Gina for allowing me to be part of it all!! For my last project, I thought I would use one of my favorite chipboard pieces the Santos Doll. Although for this project I used just the cage skirt. 


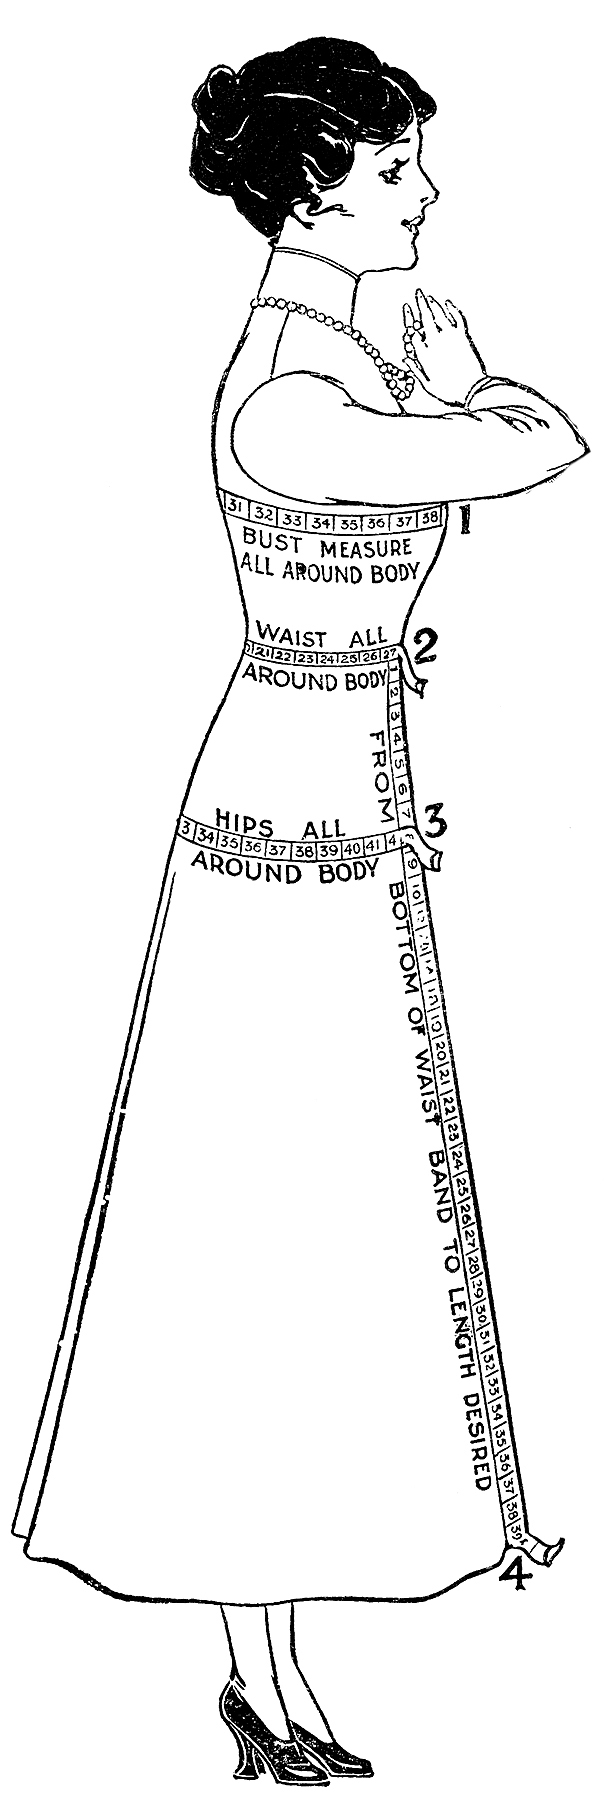
Fun Vintage Sewing Measurement Guide Mannequin Graphic!

This project was inspired by this amazing graphic from The Graphics Fairy . I instantly thought of a Steampunk Mannequin. 


I sized the mannequin down in Publisher and printed onto Ranger Sticky Back Canvas. The canvas provides the perfect texture reminiscent of a vintage dress form. I colored the image using Distress Markers. To achieve the subtle coloring I outlined around the edges and lines and then blended towards the middle with a water brush. And what Steampunk Seamstress would be complete without her wind up key? 


To add the haberdashery detail to her stash I stamped a ruler along a length of seam binding.


I tied the sash around her waist and added a pair of scissors dangling from a decorative chain. 


Of course, the cage skirt needed to be rusted. I was trying to mix a few techniques here that went awry. But instead of tossing the project I decided to embrace the extra crustiness of it. I wanted the skirt to have a more cage-like feel so dyed some skinny satin ribbon with Walnut Crystal Ink and then wrapped it around the Santos Doll


And how else would a Steampunk Seamstress get around? She needed wheels. Tim Holtz Mini Pulleys made the perfect wheels. Before attaching the Pulleys I distressed them using Mushroom Alcohol Ink. Using a Drill Punch I poked holes for the screws of the Mini Pulleys to go thru and attached them before assembling the skirt. 


The Steampunk Seamstress is ready to begin her adventures in sewing. I had a lot of fun with this project and feel it was a great way to finish my time with the team at Gypsy Soul Laser Cuts. 
Thank you for following along with me. I'll be back with more projects soon!!
Happy Creating ~ Jennalee