Friday, October 19, 2018

Bewitched Candy Box

Hello!! I'm here today with a Bewitching candy box. My favorite part of Halloween is most definitely the candy and who doesn't love having a cute way to display or gift a favorite treat. With an easy gusset, we can make the cauldron from the Be Witched Shape Set 3D. Let's get started!!


Begin by painting both cauldrons black front and back. Once dry run thru Xyron sticker maker. Apply glitter. This is my favorite way to add glitter because there is no dry time for glue and it's way less messy!!


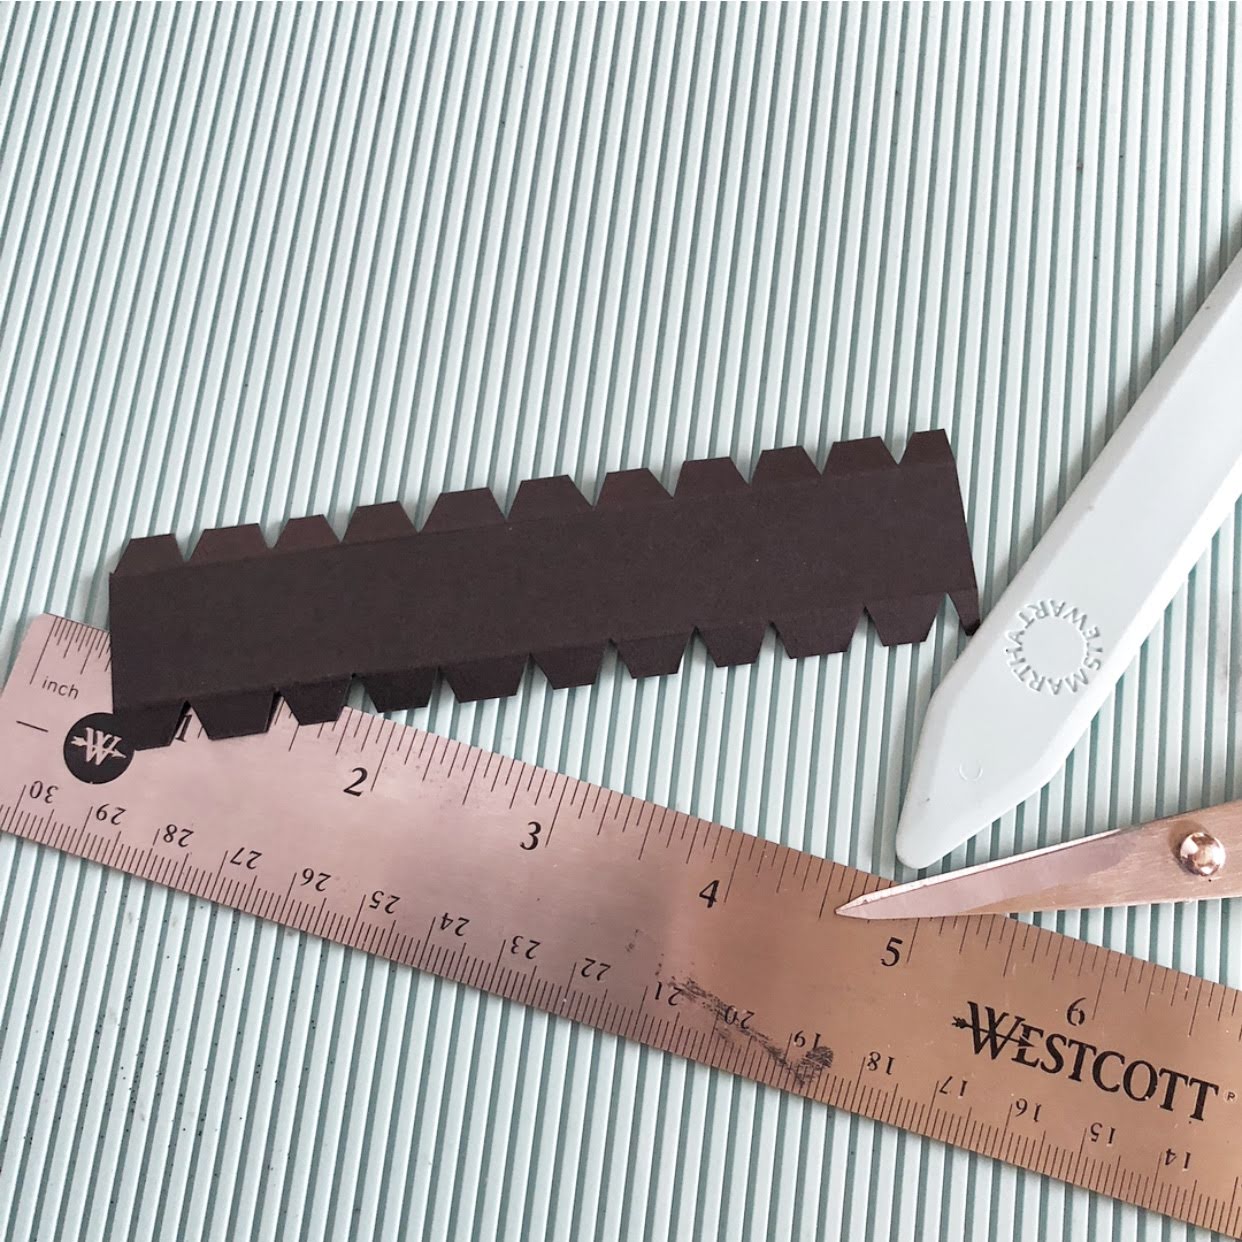
To make your gusset cut a piece of black cardstock approximately 1.25" wide by 4.5" long. Score .25 inch from the long edge on both sides. Once scored cut V shapes approximately every quarter inch along each long edge. Fold the score lines, working one side at a time apply adhesive along the edges and adhere to the back side of each cauldron piece. 


Paint a base layer on the witch's feet both front and back. Apply purple glitter to the shoes and create stripes for the stockings using glitter tape dyed with Alchohol Ink. 


Prepare the second set of legs from the set by painting front and back black. Prepare two small wood skewers painted black. Cut a block of foam to size to fit in cauldron. Once the paint all pieces have dried adhere skewers sandwiched between the front and back legs.


Once the legs have dried insert skewers into the foam block.


Prepare hat by painting both front and back purple, run thru Xyron and apply purple glitter. 


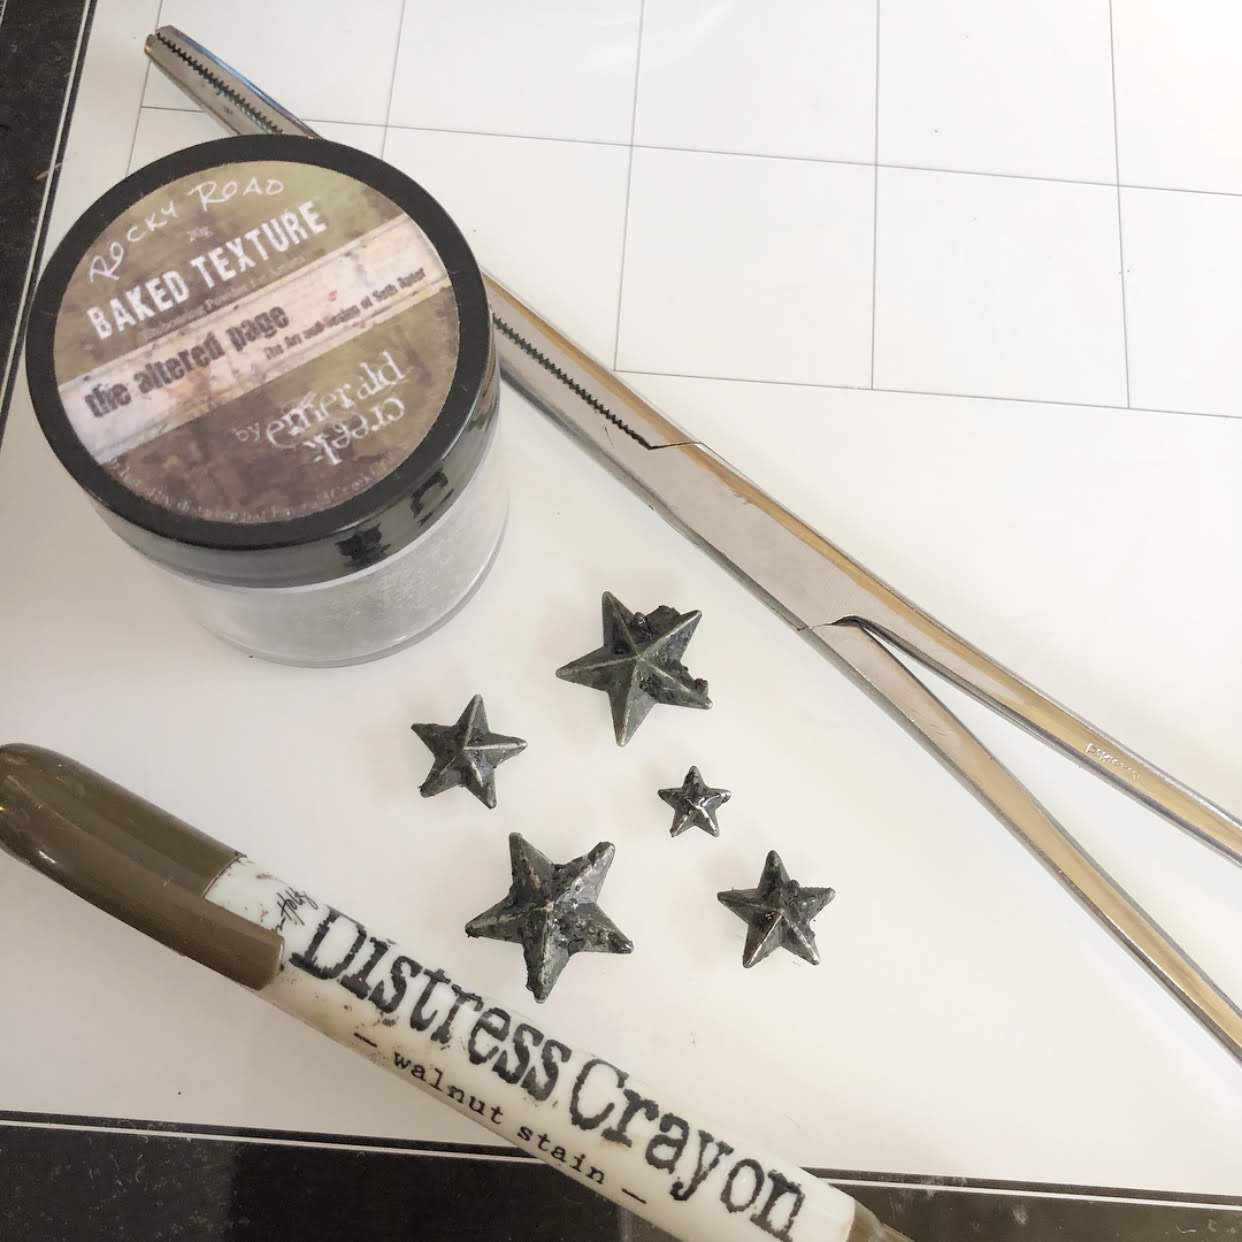
Dye the Baubles that will overflow from the cauldron. Using a small zipper seal plastic bag add a few drops of Alcohol Ink and insert Baubles. Roll them around and add ink as needed. Remove from bag and set Baubles aside to dry.  


Color a variety of sizes of Baubles using Sunset Orange, Purple Twilight, Citrus, and Watermelon Alcohol Ink. 


Adhere Baubles down the front of the cauldron as if they are bubbles cascading over the edge. 


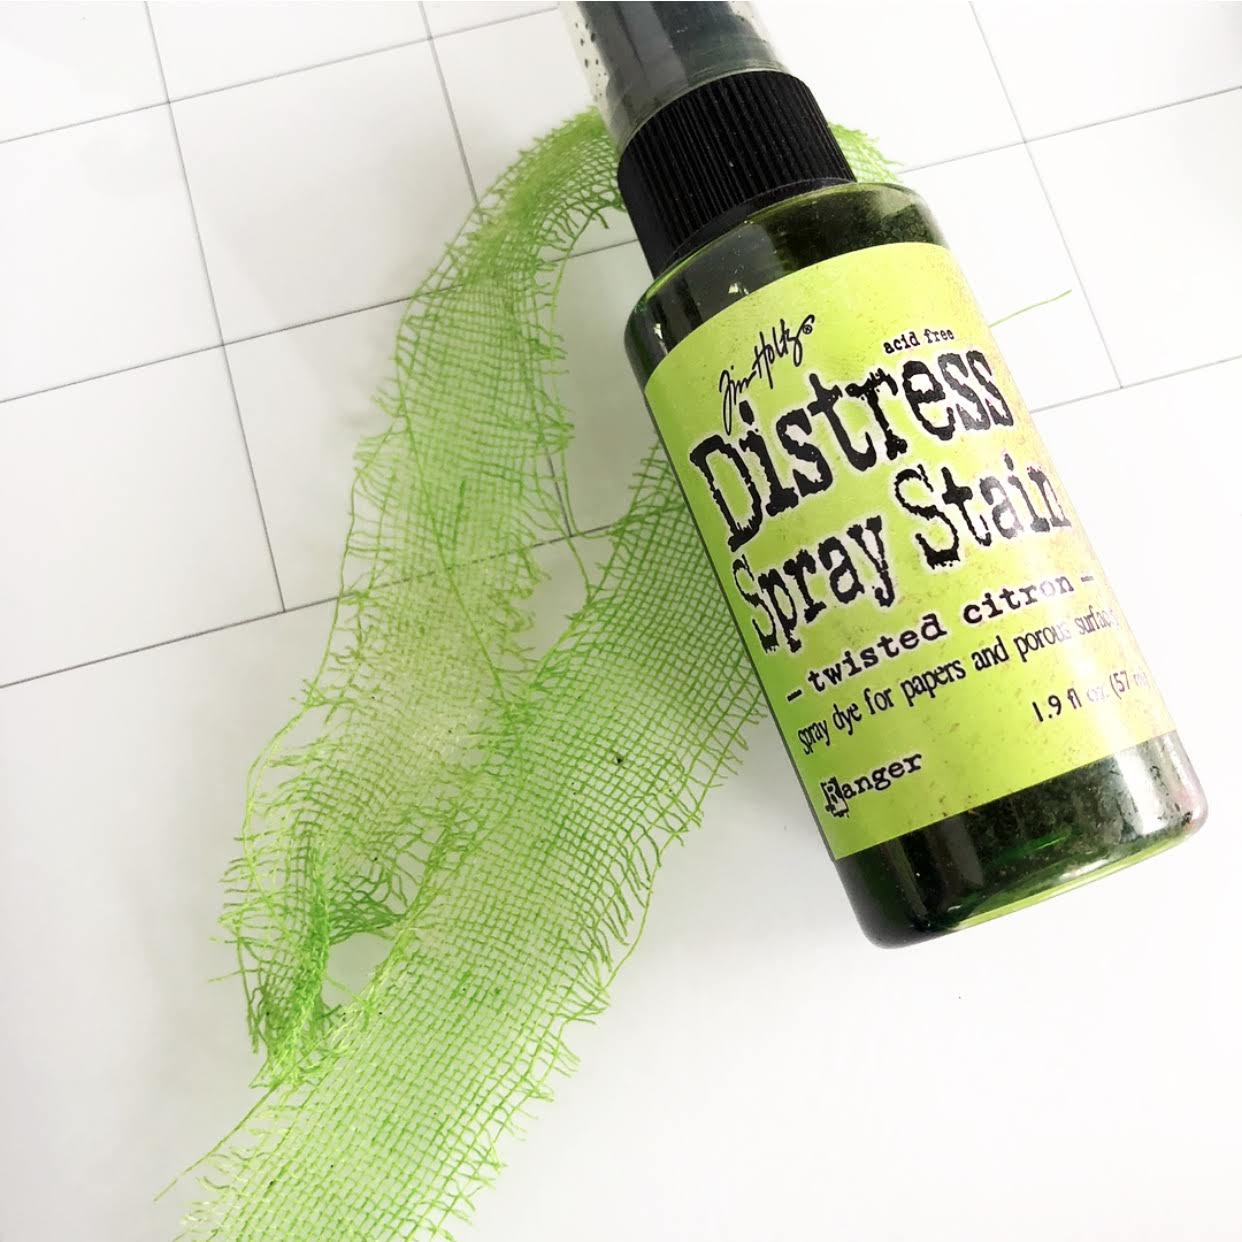
Spray Mummy Cloth with Twisted Citron Distress Spray Stain and heat set. Glue Mummy Cloth over the foam piece inside the cauldron and on top of the Trinket Box under the cauldron and hat. 


Cut Trinket Box from Mat Board covered in paper from Halloween Paper Stash. Blend edges with Black Soot Distress Ink and fill in fold lines with Black Soot Distress Marker. Use double sided super tape to assemble box. (Not all pieces are shown here.)


Cut a length of purple seam binding to wrap around the box and layer a Halloween Quote Chip on the front. Finish off by adhereing the Mummy Cloth, cauldron, and hat to the box top. Once the cauldron placement is figured out add remaining Baubles cascading onto the box top, fill with candy and enjoy. 


Although I think this project rounds up my Halloween creating that doesn't mean I won't continue the celebration with more candy!! 
Happy Creating ~ Jennalee 

Wednesday, October 10, 2018

The Midnight Apothecarist


Hello!! I just had to make another pair of witch boots from Tim Holtz's Ice Skates die from Sizzix. I stepped out of my normal whimsical Halloween style with this Etcetera Tag but really wanted to make a slightly more spooky piece for these boots. 


Begin prepping a small Etcetera Tag measuring 5 1/2" x 10". Adhere black Kraft-Stock with Distress Collage Medium. Randomly sand and then ink with Frayed Burlap Distress Ink. 


Cut piece of Worn Wallpaper Halloween to size. Distress edges and randomly and bend wallpapaer to allow the black background to peek thru. Blend Frayed Burlap Distress Ink and messy stitch around the edges. Adhere the Worn Wallpaper layer using Distress Collage Medium. 


Don't adhere the bent corners to give the piece more dimension. 


Distress the edges of ephemera using the Paper Distresser tool and then ink with Frayed Burlap Distress Ink. Some of the labels are from the Ephemera Halloween pack and some are cut from Paper Stash Halloween. 


Heat emboss Star Adornments with Rocky Road Baked Texture. Allow stars to cool and then add Walnut Stain Distress Crayon. 


Prepare photo taken from Idea-ology Framed Portraits Halloween. Distress and ink edges using Frayed Burlap Distress Ink. Tear a piece of linen to size to frame photo and layer on a piece of sanded Kraft-Stock. Messy Stitch around photo. Finish off with Halloween Clippings Stickers.  


Cut a pair of Ice Skates from black cardstock adhered to a piece of Mixed Media paper. 


Cut along white lines shown for your witch boot. Cut a notch in the heel for extra detail. 


Cover boots with a layer of Distress Crazing Medium and allow to air dry. Once boots have dried rub Prima Umber Artisan Powder into the cracks and wipe away excess. Cut a length of Eclectic Elements Craft Thread and run thru a paper towel to dampen. Randomly run Walnut Stain Distress Crayon along the length of Craft Thread. With needle thread boots by beginning at back of boot and pulling thread thru til even lengths are on front and back. Thread thru every other hole and leave remaining tale at top of boot. Move needle to other end of thread and thread remaing holes on boot. Tie the remaining tales at top of boot. 


Layer ephemera behind photo and adhere to tag. Adhere Stars randomly around the tag using Distress Collage Medium which works perfectly on metal pieces. To top off the tag run a piece of black Kraft-Stock thru Botanical 3D Texture Fade. Cut to size and adhere to hole reniforcer. Once dry sand edge and ink with Frayed Burlap Distress Ink. Adhere reinforcer to tag. 


Attach boots to tag using foam squares for added dimension. 


I really enjoyed working with some darker colors and a little bit spookier of a theme on this piece. I have one maybe two more Halloween projects planned and then I think it's time to start thinking about Christmas!! What is your favorite holiday to create for?

As always thanks for stopping by.
Happy Creating ~ Jennalee 


Friday, October 5, 2018

Witches Ball ATC Ticket Journal


Hello!! I'm here today with an ATC Ticket Journal with a little Halloween twist inspired by the Mini Mask Shapes. The mini masks fit perfectly on these Photobooth photos from Tim Holtz. As I started playing around with the images I thought of the ATC Ticket Journal as a mini scrapbook from a Halloween party. 


Begin by cutting Worn Wallpaper and various patterns from the Paper Stash Halloween to size for each section of the Journal. Adhere papers to Journal and ink edges with Spiced Marmalade and Black Soot Distress Ink. On the 3 middle panels layer various Halloween washi tapes. 


Prepare Photobooth photos by roughing up the edges using a Paper Distresser and inking with Tea Dye and Vintage Photo Distress Inks. 


Layer photos on patterned paper and cut to size with pinking shears. Messy stitch around the photos.  


Look at how awesomely cute these are!! 


Heat emboss the masks with various glitter powders. Adhere to photos.


Die cut the lettering for the front and back cover from black glitter paper using Tim Holtz's Wanted Alphabet die from Sizzix. 


Add die cut stars from the Witchcraft die. 


When looking for accents look at dies that have shapes that can be used in various ways. Such as the witch hat taken from the Witchcraft die. The larger star is from the Treat Bag set and the numbers come from the Mixed Media 6 set. 


I hope you enjoyed seeing how this super quick and easy project came together. Are you finding time to sneak in some Halloween creating? 
Happy Creating~ Jennalee