Friday, May 18, 2018

The Red Thread

Hello!! Happy Friday, I'm here today with a quick tutorial for this assemblage piece featuring the rusty Altoid Insert Fairy Frames.


This piece was inspired by a Chinese Proverb I recently read. It says "An invisible red thread connects those who are destined to meet, regardless of the time, the place or the circumstance. The thread may stretch or tangle, but it will never break."

This proverb resonated with me so much because my husband and I worked at the same place for a few months back in 2010. Somehow we never noticed each other. And that's quite surprising considering he's 6'3 and red-headed. He moved cross country and came back in 2011 when we met and the rest is history. Our red thread led us to each other. 


I began by rusting up the frames from the Altoid Inserts. Paint all the frames with Burnt Umber while the paint is still wet apply ground cinnamon. Build layers and heat set until the desired effect is achieved. Add accents with Prima Metallic Waxes. 


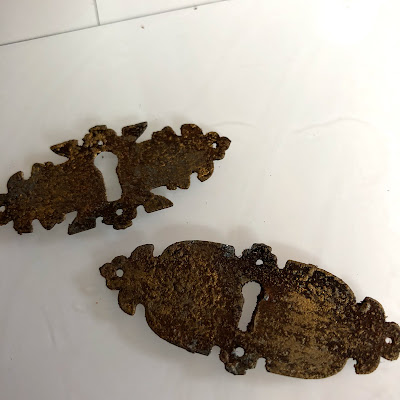
Apply same rust technique to a couple keyholes from the Key and Plates Shape Set


Attach key plate to frame with gold brads. 

Adhere frame to postcard. 


Make copies of vintage photos. Apply 3 layers of Vintage Beeswax. 

The thicker you apply the Vintage Beeswax the more transparent your photo becomes. And look at all that amazing crazing. 

Attach photo with a simple hand stitched X in all four corners. 


Attach a vintage key beneath the Altoid Frame. I used glue dots to help hold it in place due to the weight. Add handstitched details. 


To connect the two postcards stitch on a set of hook and eyes.
For the hanger at the top of the assemblage stitch on just the eye portion and tie on a red string hanger. 


Complete the bottom card the same as the top. 


Thanks so much for stopping by and spending a few minutes with me today. I really enjoyed this project. How can you go wrong with faux rust and some hand stitching? Happy Creating ~ Jennalee 


Friday, May 4, 2018

Stitching Accessories

Hello!! I'm here today with a quick set of stitching accessories perfect for a Mother's Day gift. The Dressforms 2 Miniature Set was the inspiration for this set. 


Aren't these great? 


Begin by prepping your chip board piece. Heat emboss the base with Hammered Metal. 


For the top of the dress form paint a layer of white. Add a bit of color with Frayed Burlap Distress Crayon. Heat emboss with Vintage Beeswax. 


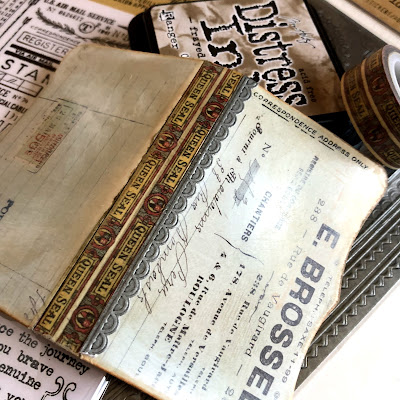
Die cut needle book from Eileen Hull's Needle Book die from Sizzix. I used double sided adhesive to attach my ephemera pieces from Tim Holtz's Layers Collector to Sizzix Mat Board and then die cut. 


Add details to cover. I used some cigar label Design Tape and an Industrial Sticker both from Tim Holtz. 


Embellish the front cover with choice of ephemera. I used a calling card from Tim Holtz's Layers Botanical set. 


The Dressform Miniature Shape was tops off the cover perfectly. The heat embossed detail makes it really pop and draw in your eye. 


To make the inside pages I folded a piece of Warm and Natural cotton batting in half and cut a page using the Needle Book die. 


To attach the page in the book I simply used some Tim Holtz's Craft Thread wrapped around the spine and the page three times and tied off on the outside of the book in a knot and bow.  


Now lets get started on the needle minder. This is such an easy accessory and the Wood Medallion 1 is the perfect size. 
I began by painting the Wood Medallion black both front and back. 


Apply a thin layer of Distress Collage Medium to top of the medallion and add foil. Once dry adhere a magnet to the back of the medallion. 


For the needle minder you will need an additional magnet to place on the back of your piece of stitching to hold in place. It provides the perfect place to rest your needle when stitching. 


The dress forms are just so cute and inspired this additional piece when I was cleaning up my studio. It was embossed the same as shown. I can't wait to use the rest of the pack up!! 


I hope you enjoyed this simple project that packs a lot of vintage inspiration. I just can't get over how cute and inspiring these Dressform Miniature Shapes are!! 

Thanks for stopping by and spending a few minutes with me today. I hope you have a great weekend and get a chance to sneak in some creative time. Happy Creating ~ Jennalee