Monday, August 20, 2018

Curiously Challenge the World

Hello!! How was everyone's weekend? I had a great weekend full of teaching, shopping, lunch with a friend and a bit of creating. I haven't had a chance to really sit and just play all month so this project was especially fun because I just let it guide me.


I received the Inventor 2 stamp set this weekend along with the new set of Distress Oxides and wanted to have a quick play. That quick play turned into a full project. 


Begin by stenciling background with Ground Espresso Distress Oxide thru Eye Chart THS010. Lightly mist with Distress Sprayer to activate the oxidation. 
As you can see I always clean my stencils. 
Once the first layer is dry with a blending tool blend on Old Paper Distress Oxide and lightly mist.
Stamp image in Jet Black Archival using your Stamp Platform to get the perfect impression.  
Set aside to dry. On the silicone mat squish Tea Dye and Old Paper Distress Oxide and spray with water. Tap paper lightly onto the droplets and let air dry. 
Using a ruler as an edge tear paper. Crumple lightly and bend edges.


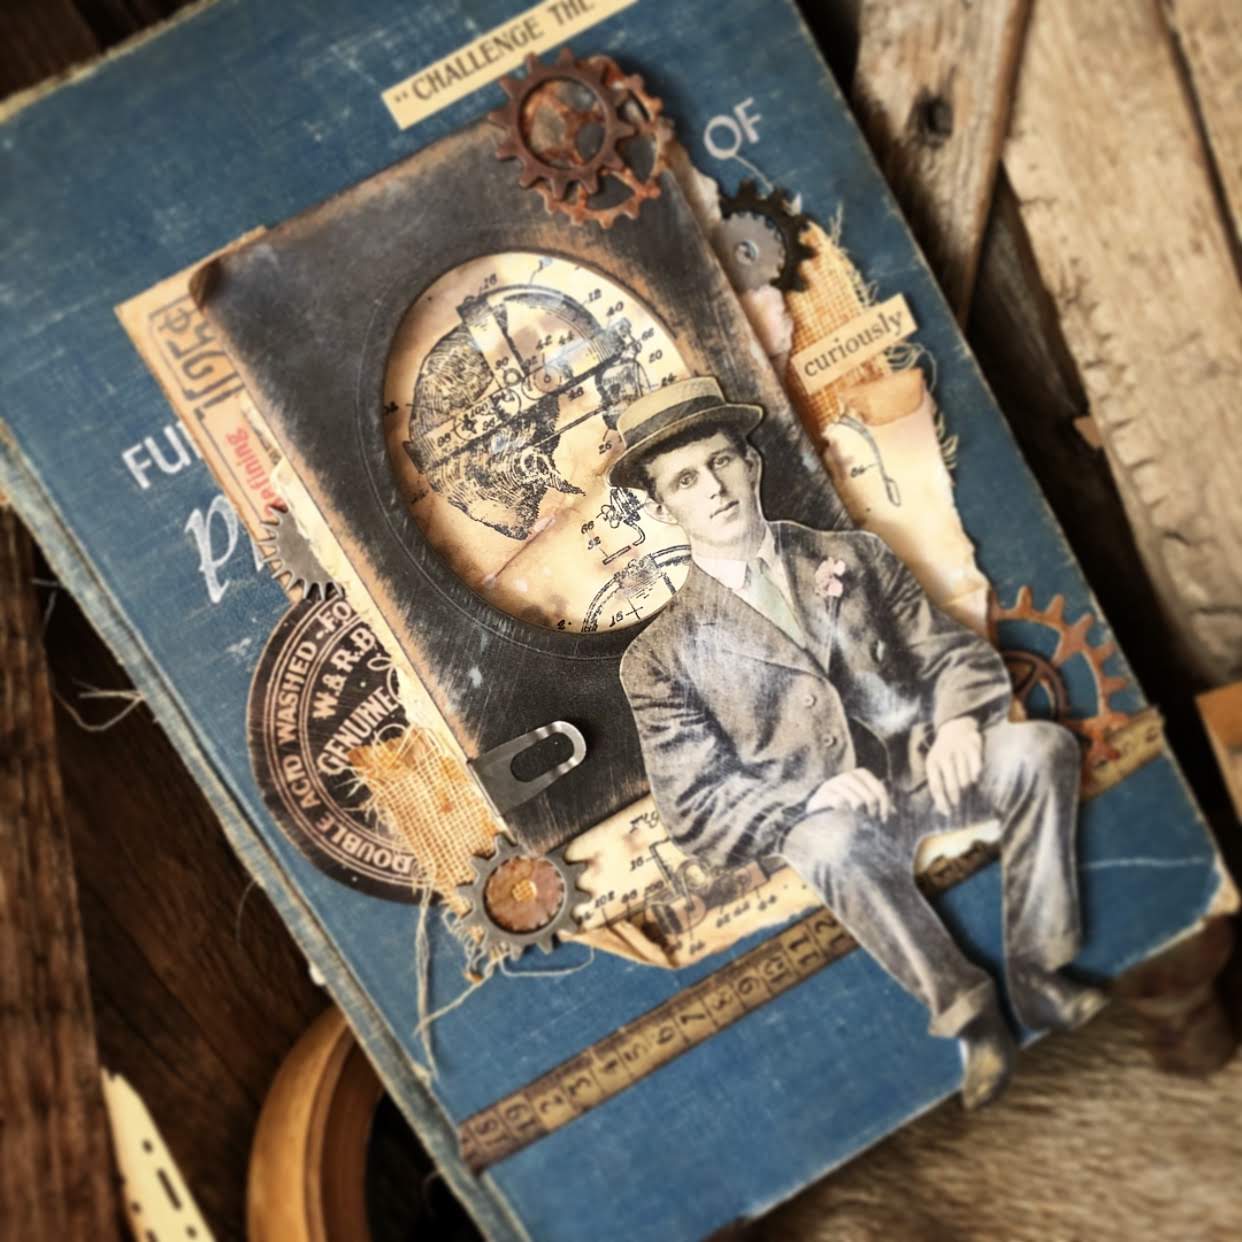
Run a length of design tape across front of vintage book cover. 


Sand Baseboard Frame and other layering elements.With a blending tool blend Vintage Photo Distress ink on both. 


Lightly sand Paper Doll and add colored accents with Distress Markers. Trace around edges of the Paper Doll with Brushed Corduroy marker to get rid of the harsh white edge. 


Cut gears from a rusted Distress Oxide background with Gearhead Thinlets set. Layer with Sprocket Gears using Distress Collage Medium to attach. 


Adhere stamped background to book cover. It's hard to see but I left bumps and folds in the paper. 


Attach frame with foam squares and layer Paper Doll using foam squares to attach to piece. 


Add sentiment from Clippings.


The hubby is quite happy to be the recipient of this collage. It will soon find its way into the man cave. 
Thanks for stopping by!! I hope your week is full of inspiration and creativity!! 
~Jennalee

Friday, August 17, 2018

Within My Heart

Hello!! This is one of those projects that had a mind of its own and couldn't be forced. Those are always my favorite after the fact. The ATC Shrine With Feet was the perfect home for this brave lady.


Begin by preparing your medal. Cut vintage photo into medal shape The one I used here I found in my stash and was already shaped this way. Heat Emboss photo using Vintage Beeswax. The Vintage Beeswax may make your photo a bit transparent. If so back photo with a scrap of gold paper from Tim Holtz's Metallic Kraft Paper Stash. Stitch around medal and add Dresden trim to the top edge. Adhere button.  


For the Shrine covering emboss aluminum tape in Botanical 3D Texture Fade from Sizzix. Color the aluminum tape using Alcohol Ink in Mushroom, Gun Metal, and Gold. Using a felt blending pad dab on colors until desired effect is achieved. Blend in Vintage Photo Distress Crayon.  


Apply aluminum tape to Shrine pieces. Making sure to adhere to the outside surfaces. The benefit of using the aluminum tape is it's self-adhesive and easy to trim using an Exacto knife. 


Cover inside surfaces of Shrine with a piece of scrapbook paper. 


Assemble Shrine with adhesive of choice. I love Distress Collage Medium for this step. 


Heat emboss a key and plate from the Keys and Plates set using Burnt Copper Leaves and drops of Patina Oxide. Cut key in half. 


Add detail to the front edge of Shrine. Lightly press Versamark embossing ink pad on edge. Heat emboss with Ancient Amber. 


Add brads to key plate and adhere to front bottom edge of Shrine. Plan placement of key and adhere to Shrine with foam squares. Apply sentiment from Tim Holtz's Clippings Stickers and adhere bird charm from Idea-ology. 


Finalize placement of all pieces and adhere your medal using foam dots. Stack foam dots 2 or 3 deep to get the depth desired. 


Although this project had a rough start I really enjoyed the process once I started trusting it. And I can say I am happy with how it turned out. I wish I knew this lady's story she looks like she has a brave heart. 

Thanks for stopping by and spending a few minutes with me today. I hope you have a great weekend!! I will be teaching a class on Saturday so I am excited to create, chat and eat some cake!! 
Happy Creating ~ Jennalee

Friday, August 3, 2018

Stay Curious

Hello, happy Friday!! When I saw this ATC Shrine I knew it would make the perfect housing for an assemblage. A little faux rust and a few gears and your piece is well underway. 


Begin by preparing a faux rust background. Cut to size and run thru Xyron. Adhere faux rust pieces to the back sides of ATC Shrine pieces. Use an Exacto knife to trim notches. 


Adhere faux rust piece to the border of the ATC Shrine door. Emboss clock face with Burnt Copper Leaves and clock hands with Charred Gold. Paint the back of the shrine door with Raw Umber acrylic paint. 


Prepare background for the inside of shrine by embossing a piece of gold paper from Tim Holtz's Paper Stash Metallic Kraft pad using the Mechanics 3D Texture Plate from Sizzix. The secret to getting a good impression is to mist your paper with water before running thru your machine. Once embossed lightly sand and ink with Frayed Burlap Distress Ink. 


Cut background to size and run thru Xyron. Adhere background to inside pieces of the shrine. Be sure to leave the tabs uncovered so your shrine will fit together correctly. 
Assemble shrine. I used Distress Collage Medium to adhere all the joints. 


Add finishing details. Using a drill punch add a hole to the side of the shrine to attach an Idea-ology Clock Key.  Adhere round ephemera piece from Layer Collector pack to shrine using foam dots. Add detail to the background with Mini Gears. Adhere a Paper Doll using two foam dots stacked for extra dimension. Fashion a cane from a Game Spinner and layered Mini Gears. 


Look at that faux rusty goodness on the back of the shrine!! 


I really love this ATC Shrine. The clock on the door was the perfect inspiration for this make. 

Thanks for stopping by!! I hope you have a great weekend and get a chance to make a creative mess. Happy Creating~ Jennalee