Friday, September 7, 2018

The Timekeepers

Hello!! I was recently cleaning up my studio and found my stash of Altoids Inserts Fairy Tale Frames leftover from a class I recently taught. When the thought occurred that they would be the perfect size for a small collaged magnet. My hubby's man cave is full of industrial stuff which means lots of metal so he'll have something to decorate those metal surfaces with now.


Begin by preparing base layers for the collage. Cut top layer of collage to size and distress using Distress Oxides in Old Paper and Vintage Photo. Tear and bend card in random areas for added interest. 


To add stability to the magnet cut a piece of heavier weight paper to size of frame. I used a piece of watercolor paper from a rust background


Prepare frames with  a faux rust finish. Paint a base layer of Raw Umber on all frame pieces. Then working one frame at time and in sections paint a second layer of Raw Umber while paint is still wet apply cinnamon powder to paint. Continute building layers of paint and cinnamon until desired texture and effect is achieved. Apply Metallique Wax in Vintage Gold and Opal Magic for added patina. 


Prepare gears from the Gears Shape Set by heat embossing with choice of embossing powders. I used Burnt Copper Leaves, Charred Gold, Rocky Road and Ancient Amber. I also used the faux rust on a few.  


Prepare clock hands from the Clock Hands Shape Set by heat embossing with gold powder. Once the hands have cooled off add depth by rubbing on and then buffing off Walnut Stain Distress Crayon 


Trace around edges of Paper Dolls from Tim Holtz with Brushed Corduroy Distress Marker. 


Figure out placement of Paper Doll and how to layer the gears in the background. I found it worked best to have one gear adhered to the background piece and the 2 remaining gears on each magnet to hang over the edge of the frame. 
Once gear placement is decided adhere Paper Doll to the frame then adhere frame to collage background. 


Finish off frame with added details of die cut numbers, Clippings stickers and attaching clock hands. 
Once all layers are dry apply a magnet to backside. 


As always thanks for stopping by. Wishing you a great weekend with a bit of creativity thrown in!! 
Happy Creating~ Jennalee 


Wednesday, September 5, 2018

Robot Mechanic Notebooks

Hello!! I recently found out that my 6-year-old nephew enjoys collecting found objects to build sculptures. Sadly we don't live in the same state so I haven't been able to see his latest masterpiece which is proudly displayed at Grandma's house. But he was very excited when I told him that he is, in fact, an Artist!! I asked him if he would like some gears to add to his pieces and he was very intrigued by the idea!! As I was thinking of what to include in his package I thought everyone needs a notebook to record their thoughts. When I showed my hubby he insisted that I make one for him as well haha!! 


Begin by stamping a robot from Tim Holtz's Robots Blueprints - CSM233 set with VersaMark embossing ink and heat embossing with Burnt Copper Leaves. 


Bend and tear edges of card. Distress edges with blending tool and Vintage Photo Distress Ink. 


Smoosh Gathered Twigs, Frayed Burlap, and Iced Spruce Distress Oxide onto the silicone mat of your Glass Media Mat. Spray each color once or twice with water. Dip stamped card in ink. Set aside to dry. 


Using the same colors as the background accents color in the robot body using a water brush. 


With craft pick poke holes for eyes, in center of the gear on the chest and at the knee joints. Add small Hex Fasteners for eyes. For chest layer Sprocket Gears and MiniGears in corresponding sizes with a Game Spinner attach all pieces to card with Hex Fastener. For knee joints add Mini Gears to the card with Hex Fastners. 


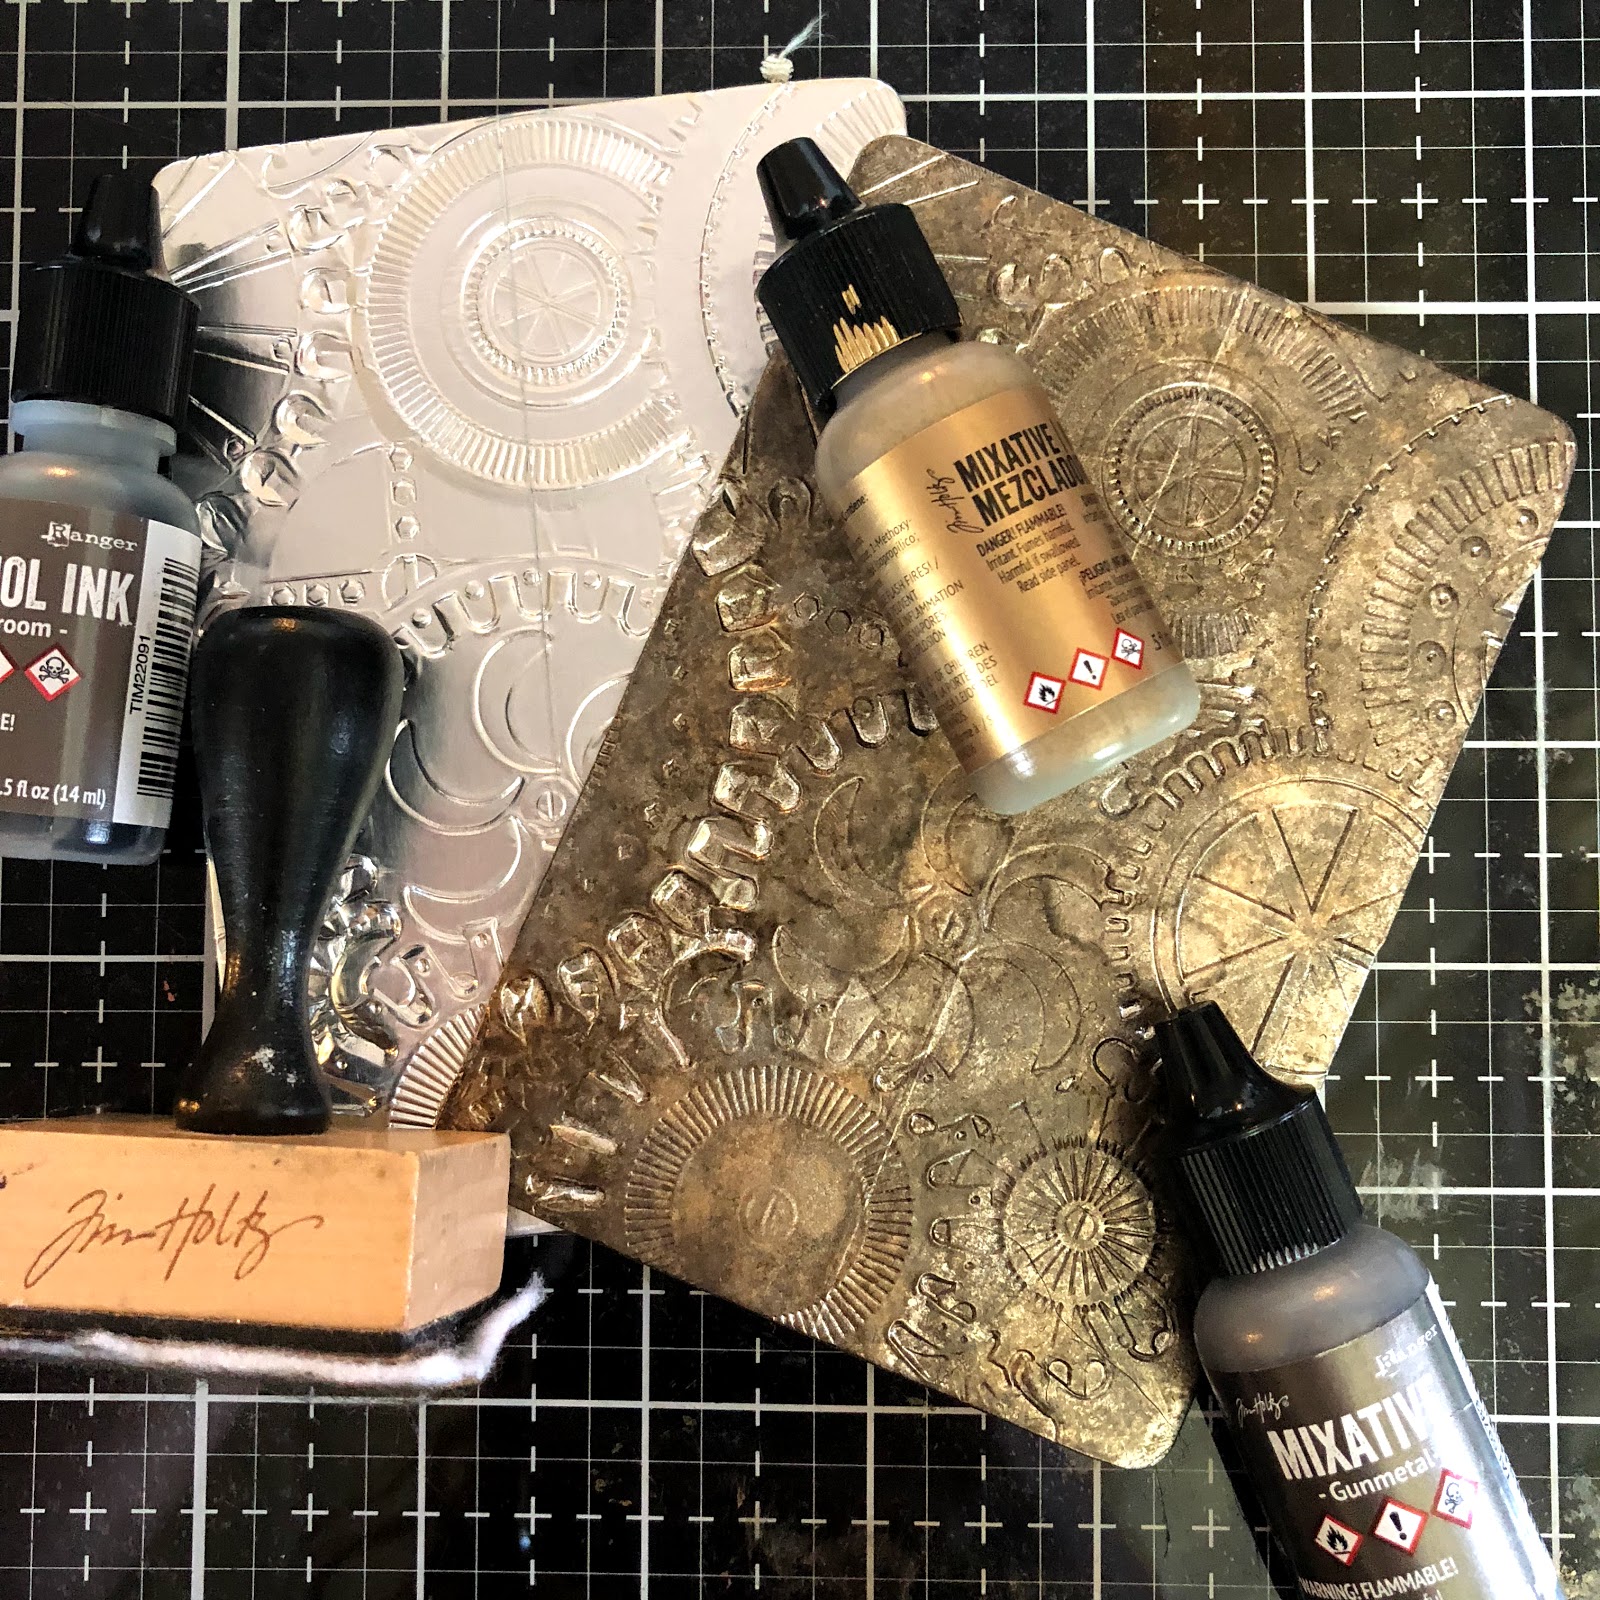
For the smaller notebook - cover a piece of mixed media paper with aluminum foil tape and emboss using Mechanics 3D Texture Fades folder. 
To add the perfect patina color aluminum foil tape with Mushroom, Gunmetal and Gold Alcohol Inks. Begin with Mushroom and build layers until desired patina is achieved. 


I mean seriously how yummy is that? The tape did leave a seam but I knew the robot card on the front cover would hide most of this. 


For the larger cover using one of my rust backgrounds that had been embossed in the Foundry 3D Texture Fades folder, I adhered the rust background to a piece of Sizzix Mat Board cut to size.
Underneath the stamped card is layered a piece of drywall tape and a couple die cut gears from Gearhead Thinlets. The bottom left corner is finished off with a Quote Chip that has been sanded and blended with Copper Metallique Wax. 


For the smaller cover adhere the stamped robot card to the front cover. 


Both covers were bound with a Cinch. 

I really had fun building these little robots. I know my hubby likes his notebook and I can only hope my nephew will be just as excited. 
Happy Creating~ Jennalee 

Saturday, September 1, 2018

Art Walk Alchemy 2019

Hello!! Have you heard the exciting news about ART WALK ALCHEMY?!?
 I am so thrilled to announce that I have been invited to teach in this year-long mixed media workshop featuring some amazingly talented artists.


What is Art Walk Alchemy?
It is a year-long workshop featuring 24 lessons from some of your favorite artists.
The 2019 theme is Totems and Talismans - those ideas, objects, and emblems that represent something significant in our lives.


Art Walk Alchemy 2019 from Mystic Spring Studios on Vimeo.


I am still busy working on my project behind the scenes but stay tuned for some sneak peeks. 

It will involve some of my favorite techniques like faux rust and crackle!! 

I hope you'll join me in making some MAGIC in 2019. 


Monday, August 20, 2018

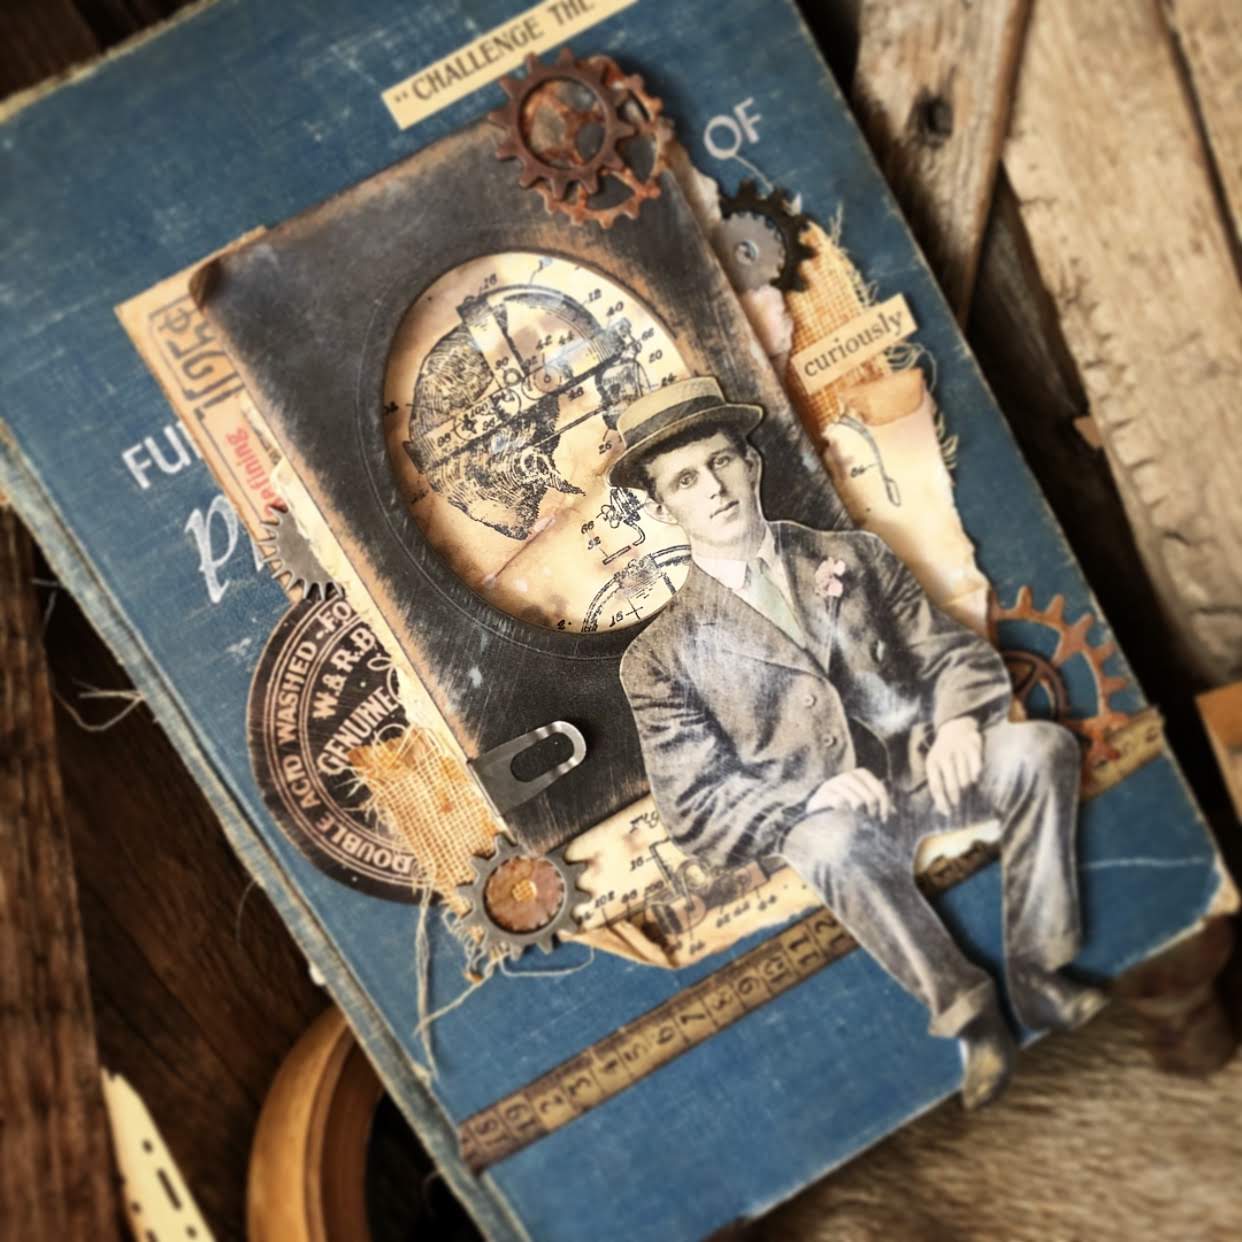
Curiously Challenge the World

Hello!! How was everyone's weekend? I had a great weekend full of teaching, shopping, lunch with a friend and a bit of creating. I haven't had a chance to really sit and just play all month so this project was especially fun because I just let it guide me.


I received the Inventor 2 stamp set this weekend along with the new set of Distress Oxides and wanted to have a quick play. That quick play turned into a full project. 


Begin by stenciling background with Ground Espresso Distress Oxide thru Eye Chart THS010. Lightly mist with Distress Sprayer to activate the oxidation. 
As you can see I always clean my stencils. 
Once the first layer is dry with a blending tool blend on Old Paper Distress Oxide and lightly mist.
Stamp image in Jet Black Archival using your Stamp Platform to get the perfect impression.  
Set aside to dry. On the silicone mat squish Tea Dye and Old Paper Distress Oxide and spray with water. Tap paper lightly onto the droplets and let air dry. 
Using a ruler as an edge tear paper. Crumple lightly and bend edges.


Run a length of design tape across front of vintage book cover. 


Sand Baseboard Frame and other layering elements.With a blending tool blend Vintage Photo Distress ink on both. 


Lightly sand Paper Doll and add colored accents with Distress Markers. Trace around edges of the Paper Doll with Brushed Corduroy marker to get rid of the harsh white edge. 


Cut gears from a rusted Distress Oxide background with Gearhead Thinlets set. Layer with Sprocket Gears using Distress Collage Medium to attach. 


Adhere stamped background to book cover. It's hard to see but I left bumps and folds in the paper. 


Attach frame with foam squares and layer Paper Doll using foam squares to attach to piece. 


Add sentiment from Clippings.


The hubby is quite happy to be the recipient of this collage. It will soon find its way into the man cave. 
Thanks for stopping by!! I hope your week is full of inspiration and creativity!! 
~Jennalee

Friday, August 17, 2018

Within My Heart

Hello!! This is one of those projects that had a mind of its own and couldn't be forced. Those are always my favorite after the fact. The ATC Shrine With Feet was the perfect home for this brave lady.


Begin by preparing your medal. Cut vintage photo into medal shape The one I used here I found in my stash and was already shaped this way. Heat Emboss photo using Vintage Beeswax. The Vintage Beeswax may make your photo a bit transparent. If so back photo with a scrap of gold paper from Tim Holtz's Metallic Kraft Paper Stash. Stitch around medal and add Dresden trim to the top edge. Adhere button.  


For the Shrine covering emboss aluminum tape in Botanical 3D Texture Fade from Sizzix. Color the aluminum tape using Alcohol Ink in Mushroom, Gun Metal, and Gold. Using a felt blending pad dab on colors until desired effect is achieved. Blend in Vintage Photo Distress Crayon.  


Apply aluminum tape to Shrine pieces. Making sure to adhere to the outside surfaces. The benefit of using the aluminum tape is it's self-adhesive and easy to trim using an Exacto knife. 


Cover inside surfaces of Shrine with a piece of scrapbook paper. 


Assemble Shrine with adhesive of choice. I love Distress Collage Medium for this step. 


Heat emboss a key and plate from the Keys and Plates set using Burnt Copper Leaves and drops of Patina Oxide. Cut key in half. 


Add detail to the front edge of Shrine. Lightly press Versamark embossing ink pad on edge. Heat emboss with Ancient Amber. 


Add brads to key plate and adhere to front bottom edge of Shrine. Plan placement of key and adhere to Shrine with foam squares. Apply sentiment from Tim Holtz's Clippings Stickers and adhere bird charm from Idea-ology. 


Finalize placement of all pieces and adhere your medal using foam dots. Stack foam dots 2 or 3 deep to get the depth desired. 


Although this project had a rough start I really enjoyed the process once I started trusting it. And I can say I am happy with how it turned out. I wish I knew this lady's story she looks like she has a brave heart. 

Thanks for stopping by and spending a few minutes with me today. I hope you have a great weekend!! I will be teaching a class on Saturday so I am excited to create, chat and eat some cake!! 
Happy Creating ~ Jennalee