Wednesday, September 19, 2018

Look Around For Light

Hello and happy Wednesday!! I hope your week is treating you well so far. I don't know if you've noticed but I've been on a bit of a masculine kick recently. I love the rusty, crustiness that is so easy to incorporate into a masculine styled piece and this project is no exception. This all started with the idea of making a blueprint using Tim Holtz's new Inventor 2 stamp set from Stamper's Anonymous. Recreating a blueprint was a lot of fun!! 


Begin by inking a piece of paper using a blending tool and Chipped Sapphire Distress Ink. Spray with water and set aside to dry. Continue adding water and allowing to dry until the desired effect is achieved. 

 I chose Drawing Paper because I wanted something that was going to be easily manipulated but could hold up to a bit of water.


Tear paper to size and secure on Stamp Platform. With finger randomly apply Tarnished Brass Distress Paint. Stamp image and then immediately clean stamp before paint fully dries. 


With white ink stamp entire image and stamp. 


Using the silicone mat on your Glass Media Mat smoosh some Old Paper Distress Oxide and spray with water. Randomly drag blueprint thru ink and set aside to dry. Crinkle and tear blueprint to size to fit in a Trinket Tin. 
Because I tore off most of the script writing when tearing my piece to size I went back and added some of the script to the side of the blueprint piece. 


Using a hammer randomly add dents to the Trinket Tin. Add further distressing using a sanding block.
Note- I did not hammer on my Glass Media Mat!! 


With a felt blending pad and Mushroom Alcohol Ink add color to the tin. Randomly apply ink from the Embossing Dabber and sprinkle on Dirty Sand Baked Texture. Heat emboss and allow to cool. Once cool add a bit of Mushroom Alcohol Ink to the embossed areas for that extra grungy look.
With finger add a few swipes of Cracked Pistachio Distress Oxide. 


Here is the difference between new and altered. This was a lot of fun!!! 


Distress the inside of the Trinket Tint. Apply Ground Espresso Distress Paint. Again using the Embossing Dabber apply ink randomly in corners and apply Dirty Sand Baked Texture. Same as before heat set, allow to cool and add a bit of Mushroom Alcohol Ink. 
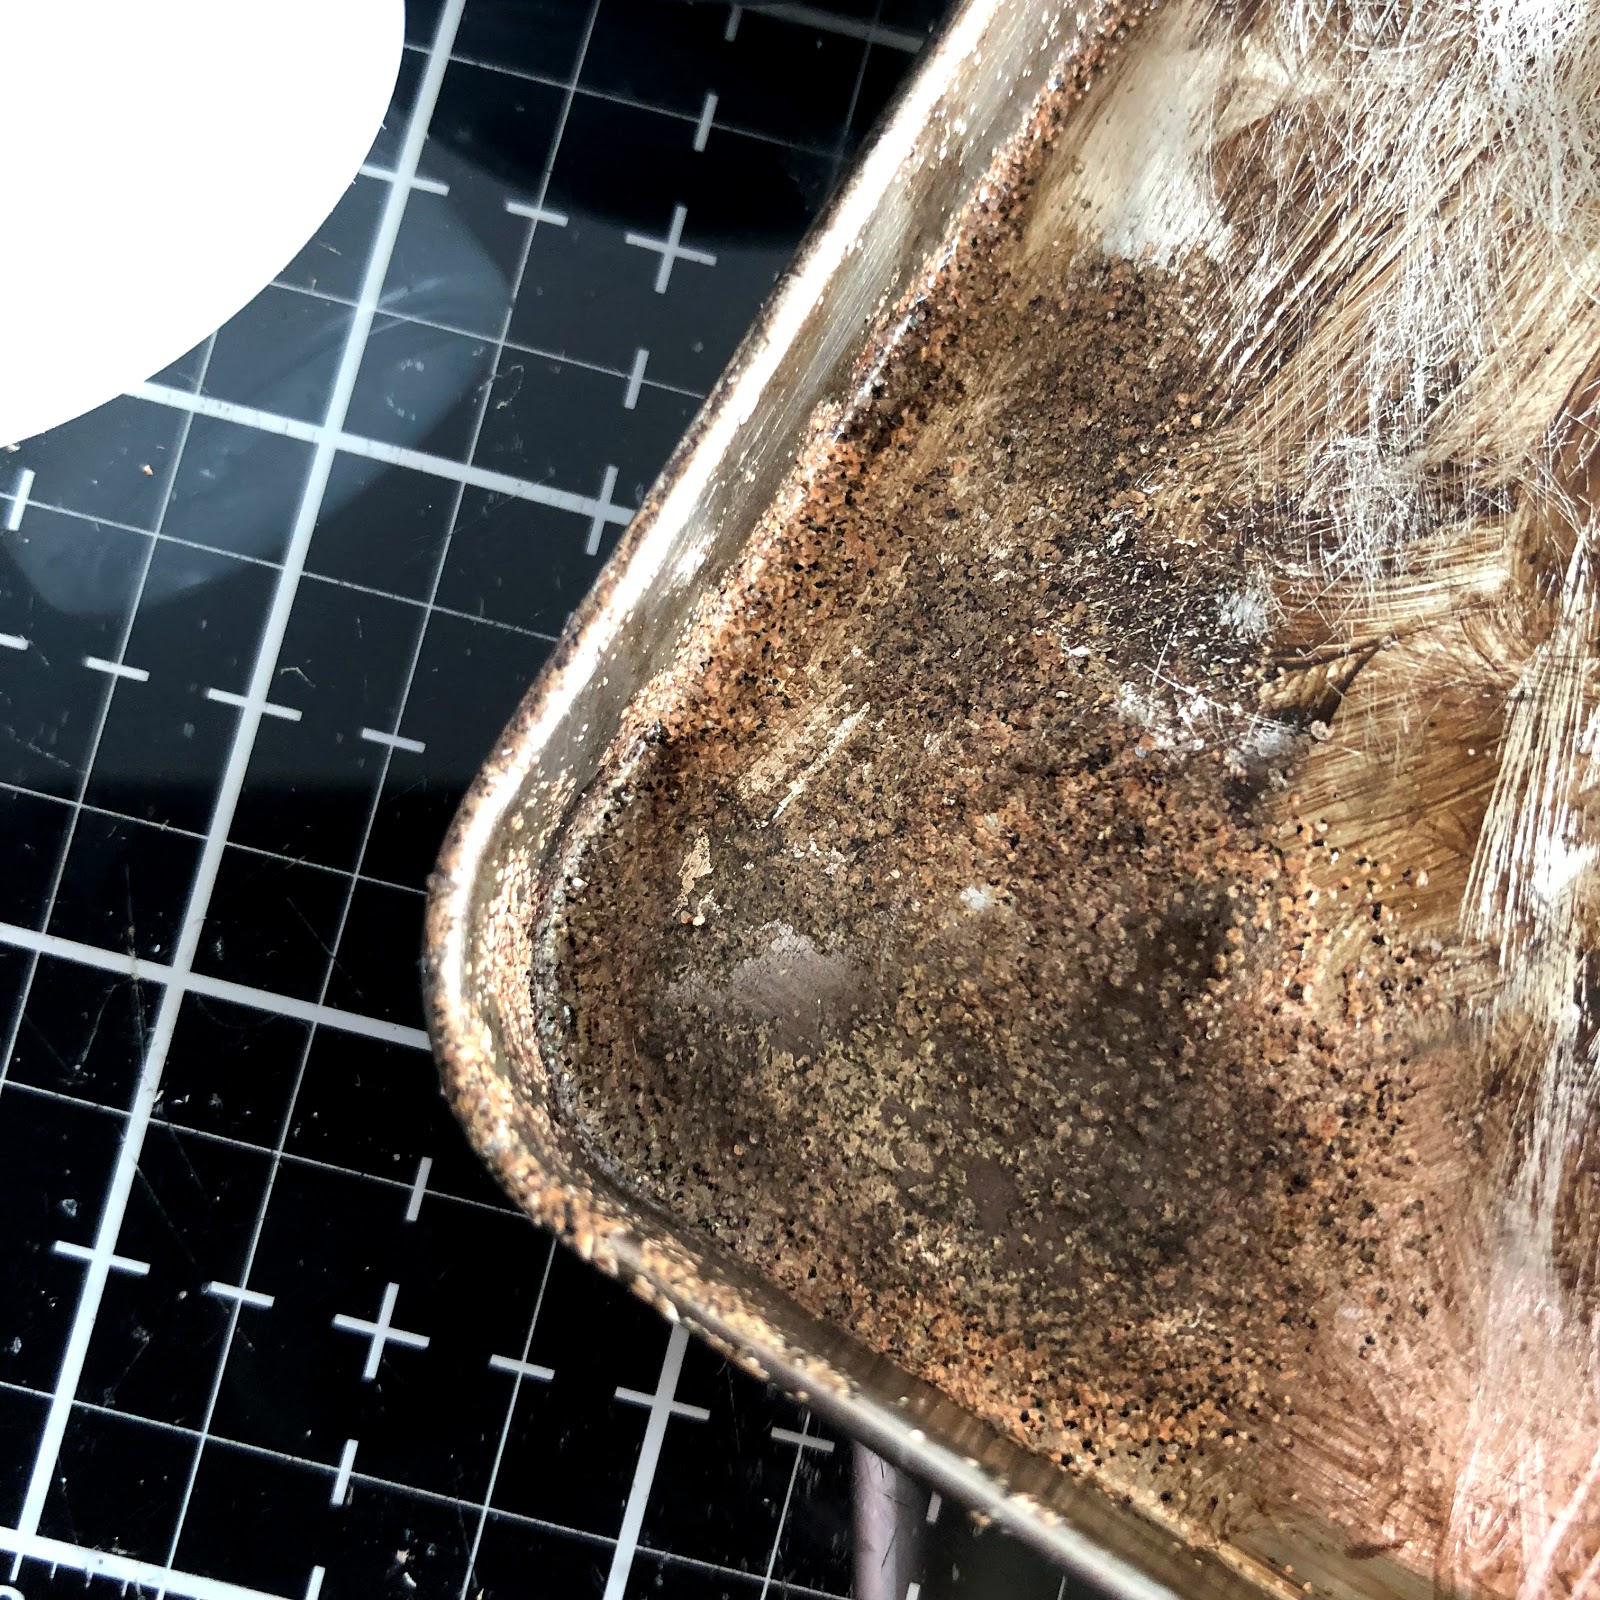

I mean come on!! Look at that texture!! 


Prepare insert for the inside of the Trinket Tin lid. Cut time card to size bend edges and crinkle. Smoosh Old Paper and Vintage Photo Distress Oxides onto the silicone mat and spray with water. Drag card thru inks and set aside to dry. Prepare die cut gears using Sizzix Gearhead Thinlets cut from Rust Background. Attach die cut gear and Mini Gear using brads. 


Die cut number using the die set that came with the Sidekick. Heat emboss with Dirty Sand and Rocky Road Baked Texture powders. 


Trace around Paper Doll with Brushed Corduroy Distress Marker to eliminate the white edges.


Layer Doll and the die cut number in the lid adhering with Distress Collage Medium. 


Prepare inside of tin by inserting a piece of foam to prop up the blueprint. 


Before inserting the blueprint layer a mixture of die cut gears with Mini Gears and Sprokets. Attaching with mini brads. Apply Clippings sticker. 


Begin preparing Etcetera Tag by applying a page of book text using Distress Collage Medium. Make sure to work in sections so that the Collage Medium doesn't' dry on your piece before you are done working it. 
Allow this layer to dry. Once dry apply a layer of Crazing Medium using a palette knife. 


Once the layer of Crazing has dried add further detail with Vintage Photo Distress Ink and Distress Crayon. Apply a second piece of the blueprint with Distress Collage Medium layering die cut gears underneath. Leave corners unglued and add wrinkles to paper as you are applying. 


Heat emboss the hole reinforcer with Dirty Sand and Rocky Road Baked Texture. Adhere to tag with Collage Medium. 


With blending tool ink Ruler Piece with Vintage Photo Distress Ink. Cut to size using scissors. 


Alter Adornments Foundry using Mushroom Alcohol Ink and Peeled Paint Distress Crayon. 


Attach Ruler Piece to Etcetera Tag using the nails from Vignette Hardware. 
Note- do not hammer on Glass Media Mat!! 


Layer die cut gear on the lid of Trinket Tin. Wrap wire around a small bulb and adhere to the lid with hot glue. I really have no idea what this bulb is from it came from a random drawer of found junk. 


I had so much fun creating all the different textures and finishes in this piece. I think my favorite was altering the tin. I definitely need to find a reason to bang up and sand a few more!! Thanks for stopping by and spending a few minutes with me today. I hope you are able to sneak in a few minutes of creating before the weekend hits. 
Happy Creating ~ Jennalee 


Wednesday, September 12, 2018

Whimsical Witch Boots

Hello!! Can you believe it's already time to start dreaming up Halloween projects? While mindlessly scrolling Pinterest a few weeks ago I saw a pair of witch boots made from Tim Holtz's Ice Skate die from Sizzix. I thought it was a great way to get more use out of an already great die. As I started cutting and experimenting I got to thinking about what a vintage witch boot would look like and decided to add a couple more simple cuts to change it up just a little. 


Start by layering a piece of mixed media paper or mat board with double-sided adhesive sheet and top off with a black piece of Kraft-Stock. 


Run layered papers thru die cut machine. Remember to put the right side of the paper down on the die. 


Cut along the lines drawn in white. 


Here is a closeup of the detail in the heel. When cutting off the top of the boot an angle be sure wherever your top hole lands it is left intact to hold your shoelace. 


Sand the edges of the boots and blend with Black Soot Distress Ink. 


Prepare Seam Binding Ribbon, Thread, and Ricrac by dying with Distress Inks and Oxides. Here is a super simple video showing my process. This is my very first video 😬. It was a learning process, but I hope to bring more technique videos your way. 


From the back of the boot use the Craft Pick to prepare the holes for the shoelace. Begin by bringing needle from back to front. Pull the thread so that there are even amounts on either side of the boot. Thread every other hole and leave the remaing thread at top of boot. Thread needle with other end of the thread. Bring thread up and over to top of the boot and thread remaining holes. When you reach the top tie off remaining tails in a double knot and tie a bow. 


Run a length of double-sided adhesive along top edge on the backside of the boot. Gather and adhere dyed seam ribbon binding. 


Adhere dyed ricrac with Distress Collage Medium.


Trim Quote Chip to size to fit the top of the Display Hanger. Sand and ink with Vintage Photo Distress Ink. 


Adhere the Quote Chip to the Display Hanger with double-sided red tape. Tie a bow around the top of the hanger. 


Prepare background layers. Begin by cutting a piece of the beautifully flocked polka dot paper from the Halloween Paper Stash. Trim with pinking shears for decorative edging. Rip a piece of Eclectic Elements Provisions to size. Cut top layer from Worn Wallpaper Halloween. 


Cut labels from patterned paper in the Halloween Paper Stash. Tear a strip from Multi Haunted Materialize. Messy stitch all layers together. Adhere boots to background and clip on Display Hanger. 


I don't know about you but I am ready to start stocking up on all that Halloween candy. For the trick or treaters of course!! 

Happy Creating ~ Jennalee 


Friday, September 7, 2018

The Timekeepers

Hello!! I was recently cleaning up my studio and found my stash of Altoids Inserts Fairy Tale Frames leftover from a class I recently taught. When the thought occurred that they would be the perfect size for a small collaged magnet. My hubby's man cave is full of industrial stuff which means lots of metal so he'll have something to decorate those metal surfaces with now.


Begin by preparing base layers for the collage. Cut top layer of collage to size and distress using Distress Oxides in Old Paper and Vintage Photo. Tear and bend card in random areas for added interest. 


To add stability to the magnet cut a piece of heavier weight paper to size of frame. I used a piece of watercolor paper from a rust background


Prepare frames with  a faux rust finish. Paint a base layer of Raw Umber on all frame pieces. Then working one frame at time and in sections paint a second layer of Raw Umber while paint is still wet apply cinnamon powder to paint. Continute building layers of paint and cinnamon until desired texture and effect is achieved. Apply Metallique Wax in Vintage Gold and Opal Magic for added patina. 


Prepare gears from the Gears Shape Set by heat embossing with choice of embossing powders. I used Burnt Copper Leaves, Charred Gold, Rocky Road and Ancient Amber. I also used the faux rust on a few.  


Prepare clock hands from the Clock Hands Shape Set by heat embossing with gold powder. Once the hands have cooled off add depth by rubbing on and then buffing off Walnut Stain Distress Crayon 


Trace around edges of Paper Dolls from Tim Holtz with Brushed Corduroy Distress Marker. 


Figure out placement of Paper Doll and how to layer the gears in the background. I found it worked best to have one gear adhered to the background piece and the 2 remaining gears on each magnet to hang over the edge of the frame. 
Once gear placement is decided adhere Paper Doll to the frame then adhere frame to collage background. 


Finish off frame with added details of die cut numbers, Clippings stickers and attaching clock hands. 
Once all layers are dry apply a magnet to backside. 


As always thanks for stopping by. Wishing you a great weekend with a bit of creativity thrown in!! 
Happy Creating~ Jennalee 


Wednesday, September 5, 2018

Robot Mechanic Notebooks

Hello!! I recently found out that my 6-year-old nephew enjoys collecting found objects to build sculptures. Sadly we don't live in the same state so I haven't been able to see his latest masterpiece which is proudly displayed at Grandma's house. But he was very excited when I told him that he is, in fact, an Artist!! I asked him if he would like some gears to add to his pieces and he was very intrigued by the idea!! As I was thinking of what to include in his package I thought everyone needs a notebook to record their thoughts. When I showed my hubby he insisted that I make one for him as well haha!! 


Begin by stamping a robot from Tim Holtz's Robots Blueprints - CSM233 set with VersaMark embossing ink and heat embossing with Burnt Copper Leaves. 


Bend and tear edges of card. Distress edges with blending tool and Vintage Photo Distress Ink. 


Smoosh Gathered Twigs, Frayed Burlap, and Iced Spruce Distress Oxide onto the silicone mat of your Glass Media Mat. Spray each color once or twice with water. Dip stamped card in ink. Set aside to dry. 


Using the same colors as the background accents color in the robot body using a water brush. 


With craft pick poke holes for eyes, in center of the gear on the chest and at the knee joints. Add small Hex Fasteners for eyes. For chest layer Sprocket Gears and MiniGears in corresponding sizes with a Game Spinner attach all pieces to card with Hex Fastener. For knee joints add Mini Gears to the card with Hex Fastners. 


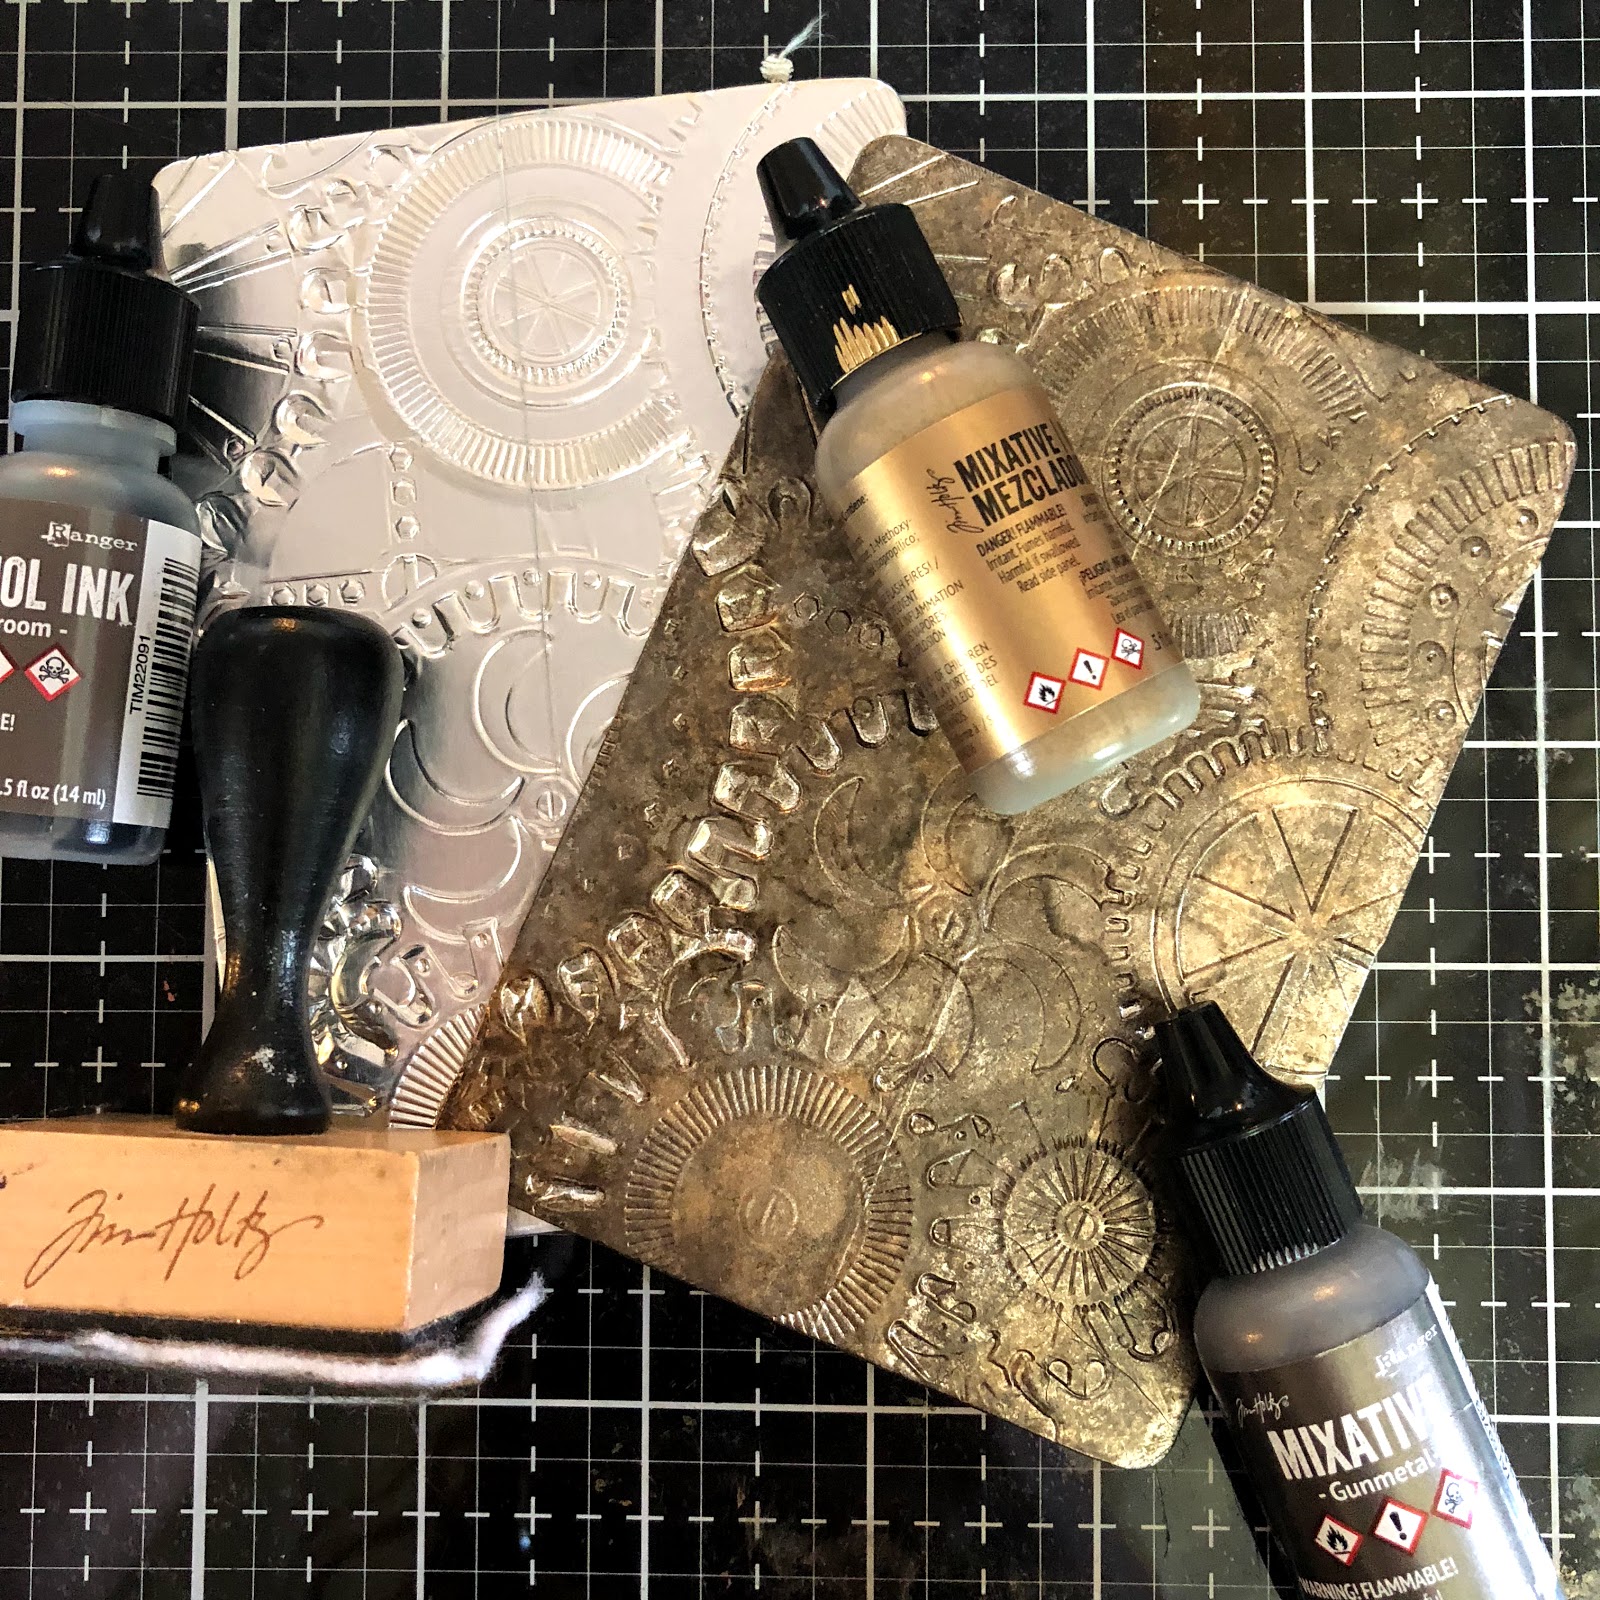
For the smaller notebook - cover a piece of mixed media paper with aluminum foil tape and emboss using Mechanics 3D Texture Fades folder. 
To add the perfect patina color aluminum foil tape with Mushroom, Gunmetal and Gold Alcohol Inks. Begin with Mushroom and build layers until desired patina is achieved. 


I mean seriously how yummy is that? The tape did leave a seam but I knew the robot card on the front cover would hide most of this. 


For the larger cover using one of my rust backgrounds that had been embossed in the Foundry 3D Texture Fades folder, I adhered the rust background to a piece of Sizzix Mat Board cut to size.
Underneath the stamped card is layered a piece of drywall tape and a couple die cut gears from Gearhead Thinlets. The bottom left corner is finished off with a Quote Chip that has been sanded and blended with Copper Metallique Wax. 


For the smaller cover adhere the stamped robot card to the front cover. 


Both covers were bound with a Cinch. 

I really had fun building these little robots. I know my hubby likes his notebook and I can only hope my nephew will be just as excited. 
Happy Creating~ Jennalee 

Saturday, September 1, 2018

Art Walk Alchemy 2019

Hello!! Have you heard the exciting news about ART WALK ALCHEMY?!?
 I am so thrilled to announce that I have been invited to teach in this year-long mixed media workshop featuring some amazingly talented artists.


What is Art Walk Alchemy?
It is a year-long workshop featuring 24 lessons from some of your favorite artists.
The 2019 theme is Totems and Talismans - those ideas, objects, and emblems that represent something significant in our lives.


Art Walk Alchemy 2019 from Mystic Spring Studios on Vimeo.


I am still busy working on my project behind the scenes but stay tuned for some sneak peeks. 

It will involve some of my favorite techniques like faux rust and crackle!! 

I hope you'll join me in making some MAGIC in 2019.