Wednesday, January 31, 2018

Creativation 2018

I can't believe that I've been home from Creativation for a whole week!! It was such a dream come true getting to attend the Creativation show. But even more of a dream to meet so many friends new and old. 

This was a huge adventure for me. It was the first time I have spent the night away from my husband. On top of that, I was meeting for the first time my IG bestie Jess Magdalia. And staying at her house for a week!! It was a bit nerve-wracking!! But from the minute I threw my bags in Jess's car and then confirmed she was, in fact, the person I was looking for I felt right at ease. 


Class kit for Seth Apter's Mixed Media Revolution. 


Messy hands are a sign of lots of fun. 


Close up of Seth's work. 


Look at those layers on Seth's piece.


The piece I created in class. This was the first class I've ever taken. It was a dream to learn so many new ideas!! 


Group shot with Seth after class. Left to Right Karen Bearse, Seth Apter, Susie Bentz, Me, Jess Magdalia, Anne Redfern, and Jenny Marples. 


Seth is not only an amazing artist but an amazing person.


Ice Resin Expression with Susan Lenart Kazmer. 


A quick pic with Susan Lenart Kazmer. If you ever have the opportunity to take a class with Susan do it!! She is an amazing teacher with such a unique style. 


From Left to Right: Lynn, Jess, Maggie, Me, Jenny and Eileen. 
Just a quick trip to JoAnn's with Eileen and the gang and Charles our Uber driver. This was also my first Uber experience. It was such a great time meeting and hanging out with Eileen. She is a fabulous designer and so genuine!! 


This was definitely one of the most exciting trips to JoAnn's. And this group of women here are so kind, talented, funny and just plain amazing!!! I count myself lucky to call them friends!! 


Anne Redfern so excited to find Tim Holtz fabric. I loved getting to know Anne she is an absolute hoot. I'm so sad we didn't get a picture together. 


Booth pics of the incomparable Tim Holtz's Idea-ology booth. The level of talent displayed here is mind-blowing and super inspiring. 


Pics from the Emerald Creek booth featuring lots of amazing art from Seth Apter. 


Jess doing a great job demoing the new Baked Textures from Seth Apter and Emerald Creek. 


It's been a lifelong dream to visit a Hard Rock Cafe and buy a t-shirt. 


One of the very few pics Jess and I took together. Next year I've gotta work on my picture taking!! 


My Dapper Dress Wall Hanging in the Coats and Clark booth. I wasn't expecting to see my work so this was a pleasant surprise!! 


A covered bulletin board I made for Coats and Clark for Quilt Market that was also displayed at Creativation. 


A sneak peek of all the amazing talent displayed in the Tim Holtz Eclectic Elements booth. 
Look at those adorable dresses. I swoon!! 


Shenanigans in the Sizzix booth. Tim Holtz's new dies were featured in 3D. Absolute genius!! 


We were on the hunt for work by our friend Stacy Hutchinson. This burlap panel is absolutely gorgeous!! 


Eileen Hull's team filled her booth with so much creativity and inspiration!!


The Ice Resin booth had so many artful pieces on display. 


My favorite part of the show was the time spent with friends. Jess and I have been friends on IG for 4 or 5 years. It was so fun to meet in real life and spend the week together. I am so blessed to count her as a real friend now. We just clicked!! The fact that she is also a sodaholic was a huge bonus!! And Miss Jenny Marples, we've been friends online for a short while but it felt like we had known each other forever!! 
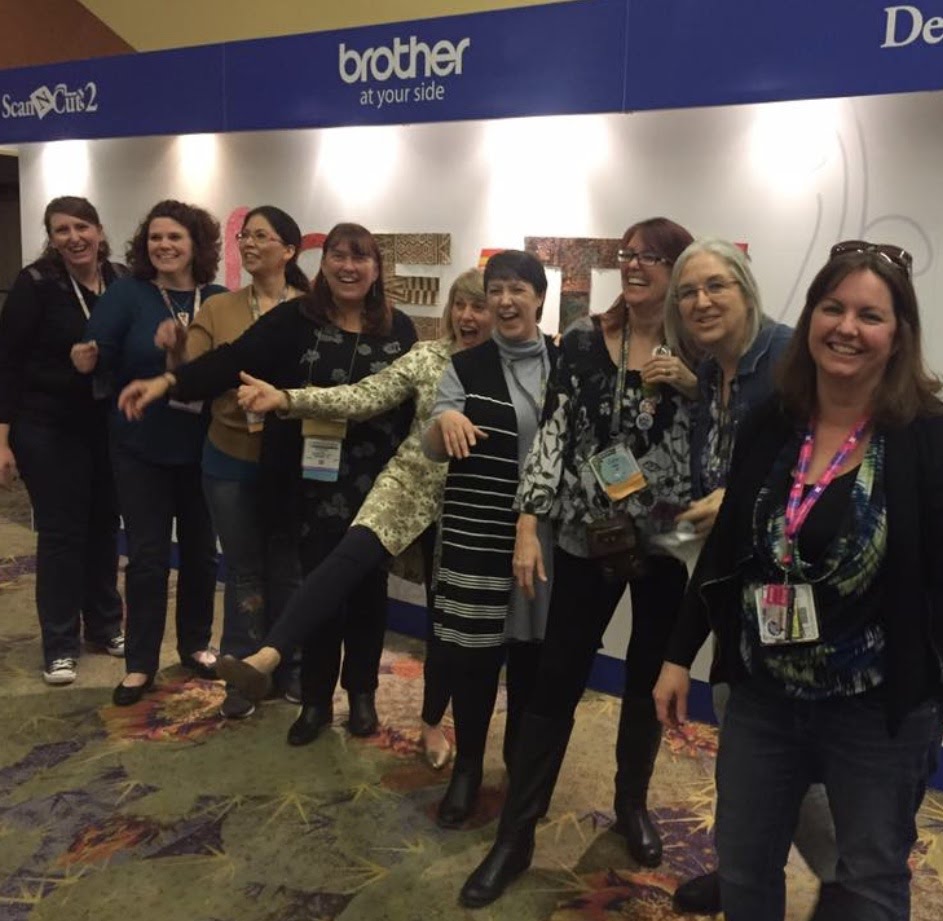

Left to Right: Me, Jess, Mitsyanna, Eileen, Brenda Walton, Jenny, Karen, Susie, Kim. 
Thank you so much to these ladies for making the week so amazing. They're definitely my tribe. It's just so amazing to find one friend who shares your love of art and creating and supports you but to find a whole group is truly a blessing. Thank you ladies!! 
 The show was an absolute whirlwind of fun and friends all with the love of creativity at the heart of it all  Only 51 more weeks until we can all do it again. Not that I'm counting or anything. 


Friday, January 19, 2018

Valentine Doll House

Hello and happy Friday!! I love Valentine's crafting, the pink and red make my heart happy. This project doesn't have any pink in it but the bold red and black were fun to experiment with.


I started with the Mini House Shadow Box 3. I thought it would be fun to make a "doll house" and have the house be the doll's body and contain a heart full of love.


I started by painting all pieces of the Mini House Shadow Box 3 with black gesso. 


I then cut a template out for the main wall of the shadow box. I cut out a piece of white cardstock slightly larger than my template. Using a black sharpie and a messy cursive strip I wrote out 'I Love You' repeatedly across the paper. I also did this for strips to cover the outer roof of the shadow box. It was a nice meditative exercise to write out such sweet words. 


I then cut strips of black and white polka dot scrapbook paper to cover the rest of the shadow box walls. I ran all the pieces thru my Xyron. It makes for super easy application. 


To finish off the inside of the house I heat embossed the floor with a red glitter embossing powder before assembling the Mini House Shadow Box 3. Using foam dots I attached a red glitter heart in the middle of the shadow box. I stamped and colored a paper doll and attached to the back of the house. I will admit this project took on a life of its own as I went, but sometimes the process of making is the more fun than the end result. 

I hope you all find some creative time this weekend!! Happy Creating ~Jennalee

Friday, January 5, 2018

Open a New Page

Hello!! I'm here with my first post of 2018. I am sure like many of you the New Year is a new slate and offers a blank page for new dreams. And who doesn't love a nice notebook to jot down notes? As you may know, I love using houses in my art and thought of these simple but amazing Simple House Ornaments in my stash and got to thinking about how they would make the perfect covers for a book. This an easy project that is taken up a level with a simple Coptic stitch which was one of my goals to learn and practice in 2018, and believe me I definitely need more practice.


I started by painting both front and back of the Simple House Ornaments pieces with Raw Umber. I did one light coat and it offered a wood-like look to the chipboard pieces. 


On the front of one ornament, I did a simple collage with various pieces of vintage text and sheet music. I applied the collage with Distress Medium. Once dry I used a palette knife to add a few random swipes of Gesso to the collage. To add some interest I stamped this image of a postmark and French postage stamp and then layered a vintage French stamp on top. 


To make the pages I made signatures of 3 pages each folded in half. I then traced around one of the house shapes and cut out. I used 6 signatures in my book. I just searched YouTube for a tutorial on how to do the Coptic stitch. This was my first time trying it. It is a simple technique but one that I need to fine tune just a little more. 


To finish off my cover I heat embossed a key from the Keys and Plates Shape Set with Burnt Copper Leaves and adhered using Distress Collage Medium. 


I will probably use my little book to write quotes in. I can see many more of these in my future though!! I hope I have inspired you to try this simple bookbinding technique. If you do give it a try I would love for you to share. Wishing you a creative and happy new year!! ~Jennalee 

Friday, December 15, 2017

Easy Snowflake Earrings

Hello!! Today I am sharing a super easy project. Although it's  super easy  it's sparkly and perfect for any upcoming Ugly Sweater parties you may be attending. When I recently got the Snowflakes Mini set they screamed earrings to me!


I chose 2 snowflakes from the Snowflake Mini set to emboss and layer. As you can see there are some fantastic shapes in the mini set. 
I simply heat embossed each snowflake. The bottom red snowflake I embossed both front and back because they are dangly both sides will be visible. My biggest tip for embossing any chipboard is to use an Embossing Ink Dabber. It makes heat embossing chipboard a breeze! After both snowflakes are embossed use a strong hold adhesive to adhere the two together. Then simply loop onto an earring hook. 


I thought these would make an adorable hostess gift. To up the presentation, a handmade tag is always the answer. I covered the smallest tag from the Stagger Tags Small with a piece of scrapbook paper. I then added a border of gold heat embossing around the edge of the tag. To make the pop-up I used a strip of paper matching the background of the tag. Fold in thirds and then fold the 2 outer thirds in half. Punch holes and glue only the outer most folds to the tag to make it pop. Thread earrings thru. 

I hope you enjoyed this quick and easy project. I know this time of year is a blur for most of us, but this is a last minute gift you can sneak in in a matter of minutes and dazzle everyone with the final product. Wishing you a Happy Holiday!! ~ Jennalee 

Friday, December 1, 2017

Christmas Countdown Shadow Box

Hello!! How is it already December? I have been in full Christmas Crafting mode here. This project is inspired by the beautiful advent calendar made by Paula Cheney. As I was thinking of making my own version I thought that the Mini House Room 4X4 would be the perfect piece for a Christmas scene and calendar.


Start by assembling and gluing together your Mini House Room. 


Cut Background paper to size and decorate as desired. Cut coordinating paper to size for all remaining surfaces of the Mini House Room. I ran all my pieces thru my Xyron for quick application. I covered all of the exposed edges with design tape. I used papers for the Tim Holtz Christmas Paper Stash. 


I used the numbers from Tim Holtz's Christmas Alpha Tiles. I colored them with Gold Alcohol Ink. I did need two packs of the Alpha Tiles to have enough numbers. I used a nail to poke a hole thru the House and used mini brads to hang my numbers on. 


Then came the fun part!! Making a mini scene within the box. For the snow I used Grit Paste and Distress Rock Candy. Apply Grit Paste using a palette knife. While the paste is still wet sprinkle with Rock Candy for the perfect shimmer. I added snow to the peak of the roof and the floor of the house. 


The tree is a mini bottle brush tree. I removed it's original base and added it onto a bingo marker.
Santa and the reindeer are also from the Holiday release. Santa was painted with red and black acrylic paint and aged with Mushroom Alcohol Ink. The reindeer was painted with Tarnished Brass Distress Paint and aged with Mushroom Alcohol Ink. 


. I am so excited to start counting down to Santa's arrival!! I hope you enjoyed this quick tutorial. And I hope you are finding time to sneak in some Christmas crafting. Happy Creating ~ Jennalee