Friday, October 20, 2017

Sugar and Spice Phone Holder

Hi everyone!! I'm here today with a baking themed phone holder for Gypsy Soul Laser Cuts. Fall always brings the urge to bake. I find most of my recipes while scrolling thru Pinterest. So when it comes time to bake I usually just pull the recipe up on my phone which makes this phone holder the perfect kitchen accessory for me.


I come from a family that loves to bake so I dug into my box of old family recipes. Don't worry I made photocopies of the originals.


I started by painting all of the pieces front and back with Cracked Pistachio Distress Paint. I did two layers on the bottom side of the base. 


I made copies of all of the recipes I was considering using. Some of the recipes were lighter than I wanted. I added a little touch of vintage using instant coffee in a spray bottle. To help blend the edges of each card on the project I added a bit of Distress ink to the edges of each card. 


Once I figured out the placement of my recipe cards I adhered them to the phone holder using Distress Collage Medium and a palette knife. Make sure when adhering your paper to not cover the tabs. Once the Collage Medium dried I went back in with an exacto knife and cut out the notch holes on the base piece. 


I found a wooden die cut in my stash that says "sugar" I painted it in Abandoned Coral Distress Paint and adhered it to the phone holder. I left the edges the natural color of the piece. 


I added a strip of vintage Savers Coupons on the base. Using my finger and the same Cracked Pistachio paint from before I added some paint to edges of the piece and where seams of the cards met.  Before assembling the phone holder I used a brush and applied a layer of Distress Collage Medium to all of the surfaces to help protect the piece.


I used Beacon 3 in 1 adhesive to attach my pieces. 


I hope you enjoyed this project and that it inspires you to bake something yummy today!! I know I'm in the mood to get baking. Thanks for stopping by!! Happy Creating ~ Jennalee


Friday, October 13, 2017

Happy Friday the 13th

Hello!! Happy Friday the 13th!! I've always found this day to be a day of luck. 

I have a tutorial featuring my favorite number to share with you over on the My Rusty Crown blog. I hope you'll stop by and take a look. 

Here are a couple sneak peeks for you. 

Happy Creating ~ Jennalee 


Friday, October 6, 2017

Junk Journal featuring GSL

Hi everyone, Jennalee here today with a quick junk journal featuring lots of fun Gypsy Soul Laser Cuts. When I saw the Queen Anne's Lace flower laser cuts I instantly knew I wanted to make a junk journal with them. You'll have to forgive me I got so caught up in the creating process I forgot to take step by step pics, but don't worry I'll walk you thru the process. Let's get started!!


The largest of the 3 Queen Anne's Lace flowers is the star of the layered and stitched cover. 

To color the flower paint a layer of Raw Umber. Allow to dry, Spray with a gold shimmer spray. Begin by adding random swipes of gesso using a palette knife to the front cover. Then stitch on a layer of green burlap. 


On top of the burlap layer and stitch scraps of vintage book text. Then glue on small pieces of ephemera. 


Run a decorative stitch down the edge of the cover. Alternately you could stamp a border along the edge. 


For the title page stitch together a collage of vintage book text. Glue onto first page. Emboss Scribble Frame Leaves. Determine the position of the frame on page. Paint a layer of gesso where frame will go to allow for the addition of a title to be added. 


Color the mid-sized Queen Anne's Lace piece the same as the piece used on the cover. 


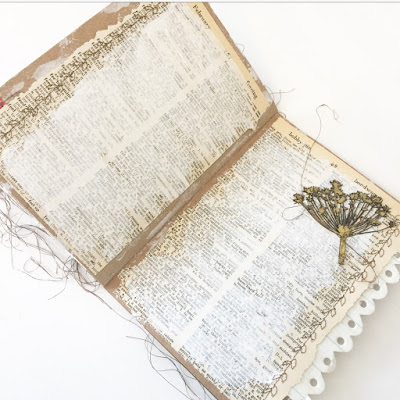
For all pages of the junk journal tear or cut vintage dictionary pages to size. Add decorative stitching to edges of each dictionary page. Using a palette knife spread a layer of gesso across the text. This allows for a "blank" background for each journal page. Writing or collage can be added as desired. Glue each dictionary page into the journal.  


Emboss Printers Ornament Corners with Salted Wine. Glue to opposite corners. 


Color the smallest Queen Anne's Lace piece same as before. Glue into journal spread. 


To add some interest to the edges and draw people into your journal add some pieces that hang off the edge of the page. 


Emboss Meadow Flowers using Camo Ammo. Glue along bottom edge of the final page of journal. 


Here is a side view of all the chunky goodness peeking out. I absolutely love how the Scribble Frame Leaves hang out over the edge. 

I hope you enjoyed this quick little journal. It was such a joy to make. I love how easy the Gypsy Soul Laser Cuts made this project. Thanks for stopping!! Happy Creating~ Jennalee 


Supplies: