Thursday, November 22, 2018

Winter Wishes Blog Hop

Warm thoughts are unfolding, as we begin to enter a festive time of year. Eileen, Kim and The Teams have created a fun blog hop challenge to kick off the American Thanksgiving and Winter festivities.

I am so excited to be part of this Emerald Creek and Eileen Hull blog hop. Most projects aren't complete without a bit of embossing on them, and this one features lots.
Eileen's journals are so functional yet fun. I love the new Wrap Journal, the size is perfect. 
The Santa suit cover was inspired by the red rubber "HO" stamp from Emerald Creek. 
This quick whimsical project is perfect for holiday journaling or list keeping. 


Begin by blending the front of your Wrap Journal with Barn Door Distress Ink and blending tool. 
Use a heat gun to heat set. 


Working one section at a time apply embossing ink to front cover using an Embossing Dauber. Apply embossing powder and heat set. I did two layers of embossing powder to get a nice even coat. 
Note- don't touch the embossed area until completely cool. Ask me how I learned that one!! 


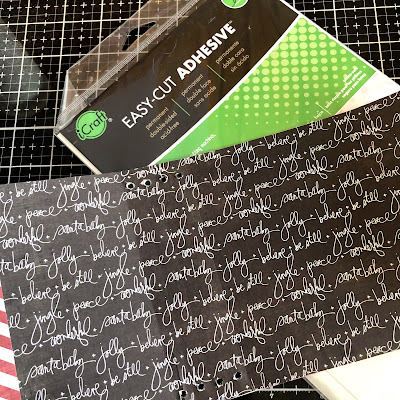
Cover the inside cover with patterned paper. Double-sided adhesive sheets make this super easy.
Add elastic binding. 


Cut a strip of faux fur to size to cover binding and adhere to journal cover. Be sure you have added your elastic binding before adhering the faux fur as it will cover the holes from the outside of the journal 


Prepare your belt by cutting a strip of fabric 4 inches wide. 


It is hard to see in this picture but fold both outside edges to the middle and iron. Then fold in half and iron again. Top stitch down both sides. 


Add buckle to one end and stitch belt. 


Working in sections apply embossing ink to "HO" stamp and stamp onto the belt. Add embossing powder and heat set. Heat embossing on fabric is fun and a great way to add texture to projects.


To finish off the edges of your journal cover emboss 2 corner charms. Be sure to use tweezers to hold the metal pieces while heat setting. And again do not touch til completely cool. Another lesson learned the hard way more than once. 


Make inserts for your Wrap Journal. Eileen's Passport Journal cuts perfectly sized inserts. 


Thanks so much for stopping by today. I hope I have inspired you to think of different ways to use embossing powder in your projects. And I hope you make it onto Santa's nice list!!
Don't forget to hop over to the next blog on the list. 

Happy Creating ~ Jennalee 


To play along all you need to do is follow along and comment on every blog. If you play along and link up your own creation using Eileen and Emerald Creek products, you will get 2 bonus entries for the draw. Contest Closes on Sunday, November 25th, with the Winner announced Cyber Monday!

Prize includes an Eileen Hull Journal Die and a $50.00 gift certificate to the Emerald Creek Shop.


Friday, November 16, 2018

Santa's Magic Key

Hello!! I'm here today with a bit of Christmas. I don't know about you but I am a true believer of Santa. And since I don't have a chimney a magical key is needed. The ATC Shrine with Feet is the perfect size for displaying this bit of magic.


Begin by painting the inside of the ATC Shrine box black. 


Cut patterned paper to size and adhere to the inside of Shrine. Sand edges and blend with Vintage Photo Distress Ink. 


Prepare outside surface of Shrine by embossing a piece of watercolor paper using Tim Holtz's Lumber 3D Texture Fade folder. Paint embossed piece to resemble wood. Randomly spray with Distress Resist Spray. While the Resist Spray is still wet sprinkle with Distress Stickles and set aside to dry. The random effects of the Distress Resist Spray makes for the perfect snow. 


Assemble Shrine and adhere the snowy wood background to the outside. 

Die cut an oval and apply to the inside of Shrine using foam squares to add depth. Using greenery die cut from Holiday Greens thinlets begin building a background. Not pictured because I got too caught up in the fun - Die cut two more oval shapes and layer. Using foam squares adhere layered ovals on top of greenery. 


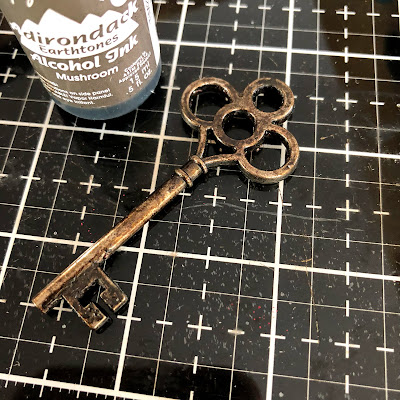
Grunge up a metal key using Mushroom Alchohol Ink. 


Apply Gold Alcohol Ink to a Story Stick and color in the word with Picket Fence Distress Crayon. 


Add a seam binding bow to the top of the key and tie on the Story Stick. Adhere to key onto layered oval. Add a Christmas Quote Chip to the bottom edge of the Shrine. 


I haven't started decorating quite yet but, I am looking forward to finding the perfect spot for my magic key Shrine. I'll be sure to leave it somewhere safe so Santa can easily find it to drop off all my goodies. I promise I've been good enough for lots of crafty presents!! 

Happy Creating ~ Jennalee 

Friday, November 2, 2018

Winter Wonder Santos Doll

Hello!! I don't know about you but now that Halloween is done and over I am ready to start Christmas creating!! When I saw the Wings Assortment Mini set (coming soon) I knew they would be perfect on a Santos Doll. I don't have an angel for my tree so I thought I would make one to display on a shelf or tabletop. Plus I love any reason to make another Santos Doll!!


Begin by painting a thin layer of gesso over the Santos doll body. Once dry paint face and hands flesh color. 


Smoosh Iced Spruce Distress Oxide on craft mat using palette knife mix Ranger Texture Paste Opaque Crackle into ink. Use palette knife to apply texture paste to doll body. Set aside to air dry. 


Once dry distress body with Vintage Photo Distress Crayon. Rub crayon on and blend in with paper towel, wipe away excess with baby wipe. 


Paint a base layer of Ground Espresso Distress Paint on wings. Once dry smoosh Frayed Burlap Distress Oxide onto wings and lightly spray. Set aside to air dry. Once dry layer more Frayed Burlap if desired. Using a scrunched up paper towel randomly pounce on Tarnished Brass Distress Paint. Heat set to make sure all layers are dry. Randomly apply Vintage Photo Distress Crayon. Don't blend in the crayon as it leaves a nice texture. Keep building layers until you reach desired look. 


Paint the base of the Santos brown. Paint all pieces front and back. Apply faux cinnamon rust to each piece. Using a cosmetics sponge apply brown paint and then dip directly into cinnamon. Pounce on more brown paint and heat set. If you have a heat gun that runs hot you can burn the cinnamon for that great crusty effect. But be careful!! 


Mix Antique Linen Distress Oxide with the Crackle Texture Paste using the same technique as above. Using a palette knife lightly and randomly apply to the Santos base. Set aside to air dry. Once dry add Pumice Stone Distress Crayon to crackled areas. As Tim says Pumice Stone is the perfect non-color. It helps the cracks to pop but doesn't overwhelm the color of the crackle paste. 


Look at that crusty crackle!! 


Cut a length of Eclectic Elements Craft Thread and run thru a baby wipe. Lay on craft mat and randomly run Vintage Photo Distress Crayon along thread. Run baby wipe across thread again. Set aside to dry. 


Sew doll body together with distressed thread. 


Using Distress Collage Medium in the cut outs of the cage skirt base and bottom construct skirt. Adhere doll body on top of skirt base. 


Construct a crown from a piece of Silver Metallic Kraft. Heat emboss crown with Emerald Creek Burnt Copper Leaves. Paint the back side of crown with Tarnished Brass Distress Paint. 


Add a bit of color to a Christmas Typed Token with Tarnished Brass Distress Paint. Once paint is dry rub Picket Fence Distress Crayon into text on token. Wipe away excess with paper towel. Using the colored Craft Thread attach token to base of mini tree. Attach tree to the top of the cage base and position hands to look like they are holding it. 


Make a small necklace from Aqua Iridescent Beade Chain and add Milagros Adornment bird charm. 


Are you beginning to think about creating Christmas projects or do you still have a few more Fall ideas? I love creating and decorating for Christmas and always feel like I run out of time so if you need me I'll be in the studio. 
Thanks for stopping by!! Be sure to leave a note and say hi!!
Happy Creating ~ Jennalee