Friday, July 21, 2017

Embark

Hello!! Today I have a project featuring an inspiring piece from Gypsy Soul Laser Cuts.  

When I sat down to start this project I had a totally different piece picked out that I wanted to play with, but this Reliquary Arch Top called my name. I have learned that some of my favorite projects are those where you follow what calls you, and this project was no exception.


I started out by painting the entire piece gold. I used Liquitex Basics because it offers great coverage with minimal coats and it has a nice sheen to it. 


I then embossed the top arch piece with Burnt Copper Leaves. I put it on quite thick. And melted it a little longer than normal to give it some movement and to really get the different layers of colors in the powder to mix and swirl together. 


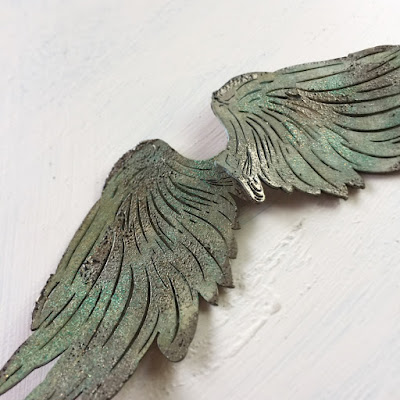
I covered the back of the arch with a piece of resin paper. Resin paper has a nice translucent quality so the choice of gold paint on the background shines thru. I stamped the image of a girl peeking thru a keyhole and colored with chalk pastels and colored pencils. I chose paper resin butterfly wings again for the sturdiness and translucent quality. 


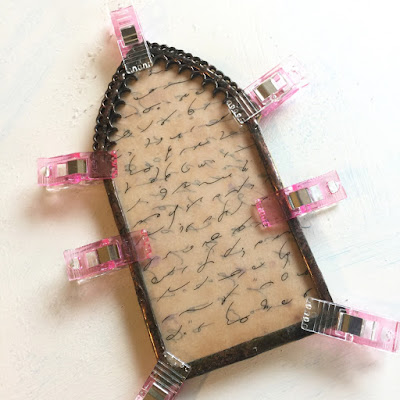
I then adhered the resin paper to the arch background and allowed to dry. I then glued the arch top onto the background and clipped while it dried. 


While that was drying I started fussing with the placement of my wings and girl. I decided that she needed some sort of crown. I had a key from the Keys and Plates Shape Set sitting on my work table. When I began looking at it the top reminded me of a crown. I embossed the top portion of the key with gold embossing powder.


It fit my image perfectly and I like the added message of knowing that it came from a key. 


I embossed both sides of a key hole with Burnt Copper Leaves and later attached to the back as a hanging bracket. 


I then finished off the back by writing myself a message in a very messy script. 

To finish off the piece I stamped on black card stock the work Embark from a mini alphabet set and heat embossed in gold. I then used my hole punch and punched out the letters and applied to the bottom of the arch piece. 


Thank you for spending a few minutes with me today. Happy Creating!! ~Jennalee

Gypsy Soul Laser Cuts used:

Other Items used:


Thursday, July 20, 2017

Distress Oxides Monoprinting

Hello!! Have you guys gotten your hands on Tim Holtz's Distress Oxides? 

They are one of my favorite new products of 2017. 

I have a quick easy tutorial to share with you today.


Have you ever tried monoprinting with a stencil? 
It was a new technique to me. Thanks to Paula @luckyday for the idea. 
It's so easy and the end result is just beautiful!! 

Supplies:
Manilla Tags 
Muslin - optional
Distress Oxide - Abandoned Coral and Wild Honey
Blending Tool
Spray Bottle 


Using Blending Tool add ink to BACK of stencil. 


Spray the inked stencil with water. 


Flip stencil over onto tag or piece of muslin. Then carefully press down. Take care not to slide the stencil or press too hard causing the excess water to leak out. Heat set. At this point you can continue to spray the Oxide inks if desired. 


I really enjoy using on Oxides on muslin. It has such a unique effect. Plus, the added benefit of making a piece of fabric to match your project. 


I hope you enjoyed this quick and simple tutorial. 

Happy Creating ~ Jennalee 

Friday, July 7, 2017

Unlock Your Wings

Hello!! I am so excited to share with you my first post on Gypsy Soul Laser Cuts

I had so much fun creating this piece using lots of awesome Gypsy Soul pieces. I am always drawn towards art that incorporates house shapes, and that was the basis of this piece. It all started with the Simple House Ornament


To start cover the Simple House Ornament with a piece of scrapbook paper and ink the outer perimeter with Distress Inks. Apply a layer of crazing medium, allow to dry. Using Gold embossing powder heat emboss the outer edges of the house ornament. Heat Emboss 3 Inch Bird Cage, key hole and key pieces from the Keys and Plates Shape Set using Charred Gold adding extra detail with Burnt Copper Leaves and Verdigris Sparkle. Also emboss 4 mini brads using Charred Gold. Stamp girl image and color as desired. With mini brads attach key hole to birdcage. 


Paint the wings from the Wings Assortment with Robin Egg Blue acrylic paint. Allow to dry.  Add detail with Cracked Pistachio Distress Oxide ink. Add random spots of Verdigris Sparkle and emboss. Around edges of wing and a few random spots on inner wing add Charred Gold embossing powder. Stamp and color girl as desired. Adhere all pieces to house ornament. Set aside.


Trace house ornament shape on scrap paper. Using a couple pieces of washi tape attach cut out pattern to the middle of a book page. With brown thread add stitching approximately ¼ of an inch around the edge of the pattern piece. Because I LOVE messy stitching I went around the perimeter 3 times. With gold thread sew the book page to a piece of muslin scrunching the fabric as you go. Add Walnut Stain Distress Oxide ink to edges of muslin and spray with water. Heat set the inks. This adds a warm vintage touch.


Hand stitch key to bottom of book page. Using glue dots attach vintage button to the round ring on bird cage and the top point of stitched house shape. Adhere house ornament to book page. Adhere finished piece to metal plaque. 


I had such a great time playing with all of these amazing chipboard pieces and watching this piece take me in a different direction than expected. Happy Creating!! Jennalee


Gypsy Soul Laser Cuts used:


Other Supplies:
Tim Holtz Craft Thread
Vintage Buttons 
Vintage Book Page 
Metal Plaque (Michael's)


Thursday, July 6, 2017

In the Good Old Summertime

Hello friends!!
I am so thrilled and honored to be the Guest Designer over at Frilly and Funkie today!!

The current challenge is "In the Good Old Summertime".

As with most projects these days my first thought was how can I incorporate some stitching? While perusing Pinterest for some Summer inspiration I thought it would be fun to do a vintage inspired bathing suit. 


After a quick run through of my stash I decided on one of my favorite fabrics from Tim Holtz's Correspondence line for Eclectic Elements. 

I started by making a fabric sandwich. I layered the fabric with double sided facing and backed it with some duck cloth for stability. I also cut my pattern out of freezer paper. You can iron freezer paper onto your fabric and then just cut out around it. I find it much easier than trying to mess with pins and stabbing my fingers!! 


I wanted my bathing suit to have a belt and contrasting straps. I had some vintage twill tape in my stash and decided to use that. I used Distress Oxide Ink in Faded Jeans to dye the tape. Cut your tape to the length needed, smoosh some of the ink onto a craft mat and spray with water. Make sure you cover all of your tape with ink. Heat set and voila custom dyed twill tape!! I stitched about a quarter inch around the edge of the suit and stitched down the belt and straps. 


I wanted my dress to be able to be displayed. So I made a stand for it out of a dowel and vintage spool. I painted my spool cream and then layered on Distress Oxide inks in Vintage Photo and Fossilized Amber. Spray and heat set. I love the oxides because depending on the amount of water you use determines the amount of vintage patina you end up with. Plus you can keep layering. For the dowel I used a blending tool and simply rubbed on Distress Oxide in Vintage Photo and heat set. Once the spool and dowel were dry I coated both with a layer of Distress Collage Medium Crazing gel. It gave a nice finish with the perfect vintage touch. I then added a bit more color using Distress Ink in Vintage Photo.


Using bits from Tim's new Snippets ephemera pack I stitched on a few pieces that reminisced a day at the beach with friends. I added a mini star fish and "memories" from the Chit Chat pack. 

To complete the spool and continue the story of the day at the beach I wrapped the spool with a torn piece of muslin and tied it around a tiny vial filled with sand. I completed the piece with a memo pin and a Elementary Flashcard. 


To finish hot glue the bathing suit to the dowel and dream of being at the beach. 


Thank you for stopping by!! I hope you enjoyed this little tutorial. 

Be sure to stop by Frilly and Funkie for even more Summertime inspiration.

~Happy Creating!!