Pages

Pages

Friday, April 20, 2018

Santos Doll

Hello!! Happy Friday, I'm here today with a Santos Doll. I am so excited to share this project with you. With a few different mediums, this Santos really comes to life!!


To begin paint all skirt pieces front and back with brown paint. Once dry assemble skirt. 


Once the glue has dried rust the skirt with Rusting Powder from PaperArtsy. Cover piece with Distress Collage Medium and sprinkle on Rusting Powder. Spray with vinegar and set aside. (I forgot to take a pic of the rusting in action)


While skirt dries paint doll body with gesso. I only painted the front. The back I inked up with Frayed Burlap Distress ink. 


For the face and hands (sorry forgot a pic again) I painted them a peach skin tone. Once dry using a palette knife I added a layer of Distress Crazing Medium. Allow to air dry. For the body and arms mix Opaque Crackle Texture Paste with Bundled Sage Distress Ink. Add to body with palette knife. Allow to air dry. 


I chose not to do a face on my doll because I can't draw, period. And I may have gone a bit crackle crazy, but I wanted my doll to have a very worn look like she had just been dug up. 

Using a craft knife I remove a few areas of medium. To add an extra grungy look rub Artisan Powder and Vintage Photo Distress Crayon into the cracks. The hairline was drawn on with Walnut Stain Distress Crayon.


The arms are one of my favorite details. I originally planned to use brads but they didn't hang quite the way I envisioned so I decided to use thread. 

Using Vintage Photo Distress Crayon color Tim' Holtz's Craft Thread. With a baby wipe run thread thru wipe and then randomly apply Distress Crayon to length of thread. This adds the perfect amount of grunginess. With needle thread thru arms and tie off. Attach arms to body same way. 


To finish off your Santos Doll drape her with your choice of jewelry. 


I used a variety of pieces from Tim Holtz's Assemblage line as well as an Idea-ology Philosophy tag. The medal came from my stash and was the perfect adornment. 

Here you can see some of the wonderful rust effect. I added highlights using Cracked Pistachio Distress Crayon. 


I really enjoyed watching this piece come together and am already planning my next one possibly for my mom, but shhh don't tell. I hope I've inspired you to explore making your own Santos Doll. As always thanks for stopping by!! Happy Creating ~ Jennalee 


Thursday, April 12, 2018

Elegant Jewels-House Journal Necklace

Hello!! I am so thrilled to be over on the Frilly and Funkie blog today as the Guest Designer. The theme this round is Elegant Jewels. When I first heard the theme I was a bit stumped. After tossing around some ideas I decided on making a piece of jewelry. I have been wanting to try a little journal necklace and thought now would be the perfect reason to make one. Let's jump in!! 


When was the last time you played with Shrinky Dinks? They're a great childhood past time, but every once in awhile I remember I have some and like to experiment with them. For this project, they are the perfect thing for the covers of the mini journal. 


If you've been following me a for a bit you know I love houses and Eileen Hull's House Pocket Die is a great simple shape and makes cutting your base super quick. 

Begin by cutting two pieces from Shrinky Dink and one piece of cardstock. The cardstock piece I used as a template for getting my holes aligned. 


Be sure to punch your holes before shrinking. And remember to punch one hole at the top of only one house. This hole will be where you attach your jump ring for your necklace. 


Ink the rough side of your Shrinky Dink shapes with Distress Inks. Regular Distress Inks and Oxide Inks both work nicely. I used a combination of both. I used a couple pieces of washi tape to tack my pieces down while inking to avoid fingerprints. 


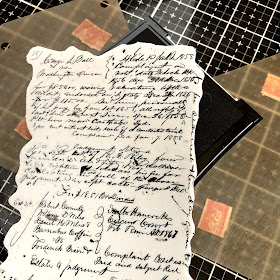
I then stamped the inked pieces with Tim Holtz's Ledger Script stamp.


I added a few random swipes of Antiqued Bronze Distress Paint to the background.


Now the fun part shrinking!! You can shrink your pieces in the oven or with your heat gun. When using your heat gun remember that the plastic is very hot!! I used a knitting needle as a guide and the acrylic stamp block works perfectly for flattening out your piece. Remove the washi tape before heating. 


Look how tiny they are!! 
I painted a coat of Antiqued Bronze Distress Paint on the backs of both pieces and edged both pieces with Tarnished Brass Distress Paint. 


I forgot to take a picture, but at this point, I made the 3 signatures for the journal. Each signature is three piece of paper folded and cut to shape. Mark your holes and use an awl to poke the holes. I used the Coptic stitch to assemble my book. Tim's Craft Thread is the perfect weight for this. 


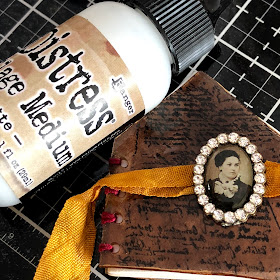
My little book needed a way to keep it closed and a piece of seam binding was the perfect thing. I colored a piece of white seam binding with Fossilized Amber Distress Ink and added accents with Vintage Photo Distress Ink. To color your seam binding spritz with water. Smoosh the ink on your craft mat and run seam binding thru it. You can either let it air dry or use your heat gun. 


This charm from Tim Holtz's Assemblage line was perfect for the front, vintage with a touch of bling. This particular charm had rings on top and bottom I used pliers to remove them and then sanded down the rough edges. 
I used Distress Collage Medium to adhere the seam binding and charm to the front cover. At this point add your jump ring to the hole in the top of the back cover and add to a chain. 


I really enjoyed making this project and look forward to filling my little journal with notes from days spent out exploring. Thanks so much for spending a few minutes with me today. If you give Shrinky Dinks a try I would love to see your creations. And don't forget to stop by the Frilly and Funkie blog to see all the inspiration!!

 Happy Creating ~ Jennalee 

Friday, April 6, 2018

Winged Believers - Folk Art Inspired Dolls

Hello!! I'm here today with a folk art inspired project. I've wanted to try my hand at painting some folk art inspired dolls for a while and the Decorative Tags X Large set provided the perfect substrate. I kept the tags on the simpler side to allow the dolls to shine. Let's jump right in.


To begin cover your tags with a thin layer of gesso using a palette knife to apply. Allow the first layer to air dry and continue building until your tag is covered and you have your desired amount of texture.


Using Distress Crayons and a wet wipe color background. Allow some areas of gesso to show thru. 


Trace around paper dolls with a Distress Marker to blend white edges. Cut dolls at waist and set aside the feet. 


Lay doll image on tag to determine where the skirt will be placed. Using a pencil sketch out a rough skirt shape and paint in shape with gesso. 


Set dolls aside and color in skirt with Distress Crayons. Messy stitch around the skirt. 

On two of the tags I used Tim Holtz's Rosette layering stencil and a wet wipe to remove some of the Distress Crayon thru the stencil. 


I kept the backgrounds simple to allow the texture to shine thru. To add some interest I layered a few pieces of coordinating tissue tape. 


I used various wings from Tim Holtz's Flutter Set colored with coordinating Distress Inks and added to each girl. To finish off tags adhere feet to bottom edge of the tag. I typed out inspiring messages and adhered to each tag. To top each one off I attached an inked hole reinforcer. 


I love the size of the Decorative Tags X Large. I also love that thickness allows for the addition of messy stitching yet holds up to multiple layers of wet media. 

Thanks for stopping by and spending a few minutes with me today. I hope these folk art girls inspire you to spread your wings and try something just a little different. Happy Creating ~ Jennalee